After testing Kubernetes locally using minikube you’re now ready to try Kubernetes in a live environment. Today you’ll be spinning up a Kubernetes cluster in the Google cloud.
Goals:
- Install Google Cloud SDK (
gcloud). - Create Kubernetes cluster using the Google Container Engine.
- Deploy our existing Kubernetes objects to the cloud.
Using Kubernetes locally has been a really nice for experimenting and learning, but at its core, Kubernetes is a tool designed to allow you to manage your production container deployments. This tutorial will be using the Google Cloud solution for Kubernetes (Google Container Engine or “GKE”) for a few reasons:
- You can get $300 in Google Cloud credits so you can try this for no cost (if you haven’t already created a Google Cloud account). Head here to sign up for the free trial.
- Google Container Engine is a managed Kubernetes solution so you don’t have to worry about managing the cluster underneath your containers.
Setting up Google Cloud Account
You’ll need to go through the process of signing up for your Google Cloud free trial, and after you’ve finished you should have your first project created for you automatically. You can use that project to follow along with this tutorial just fine.
Installing and Configuring the Google Cloud SDK
Before you can begin working with Kubernetes in the cloud you’re going to need to sign up for an account above and then you’re going to need to start working with the gcloud utility. Find installation instructions for your operating system here:
Remember: You’ll need to make sure that you put the google-cloud-sdk directory somewhere you remember and add the bin subdirectory to your $PATH.
After you’ve installed the SDK and followed the instructions (running gcloud init), you’ll also want to add the kubectl components by running the following command:
$ gcloud components install kubectlIf this command gives you an error stating that there is already a kubectl binary in your path you can either remove the other binary or ensure that the new version that is within your google-cloud-sdk/bin directory comes first in your $PATH.
Creating a Kubernetes Cloud in Google Cloud
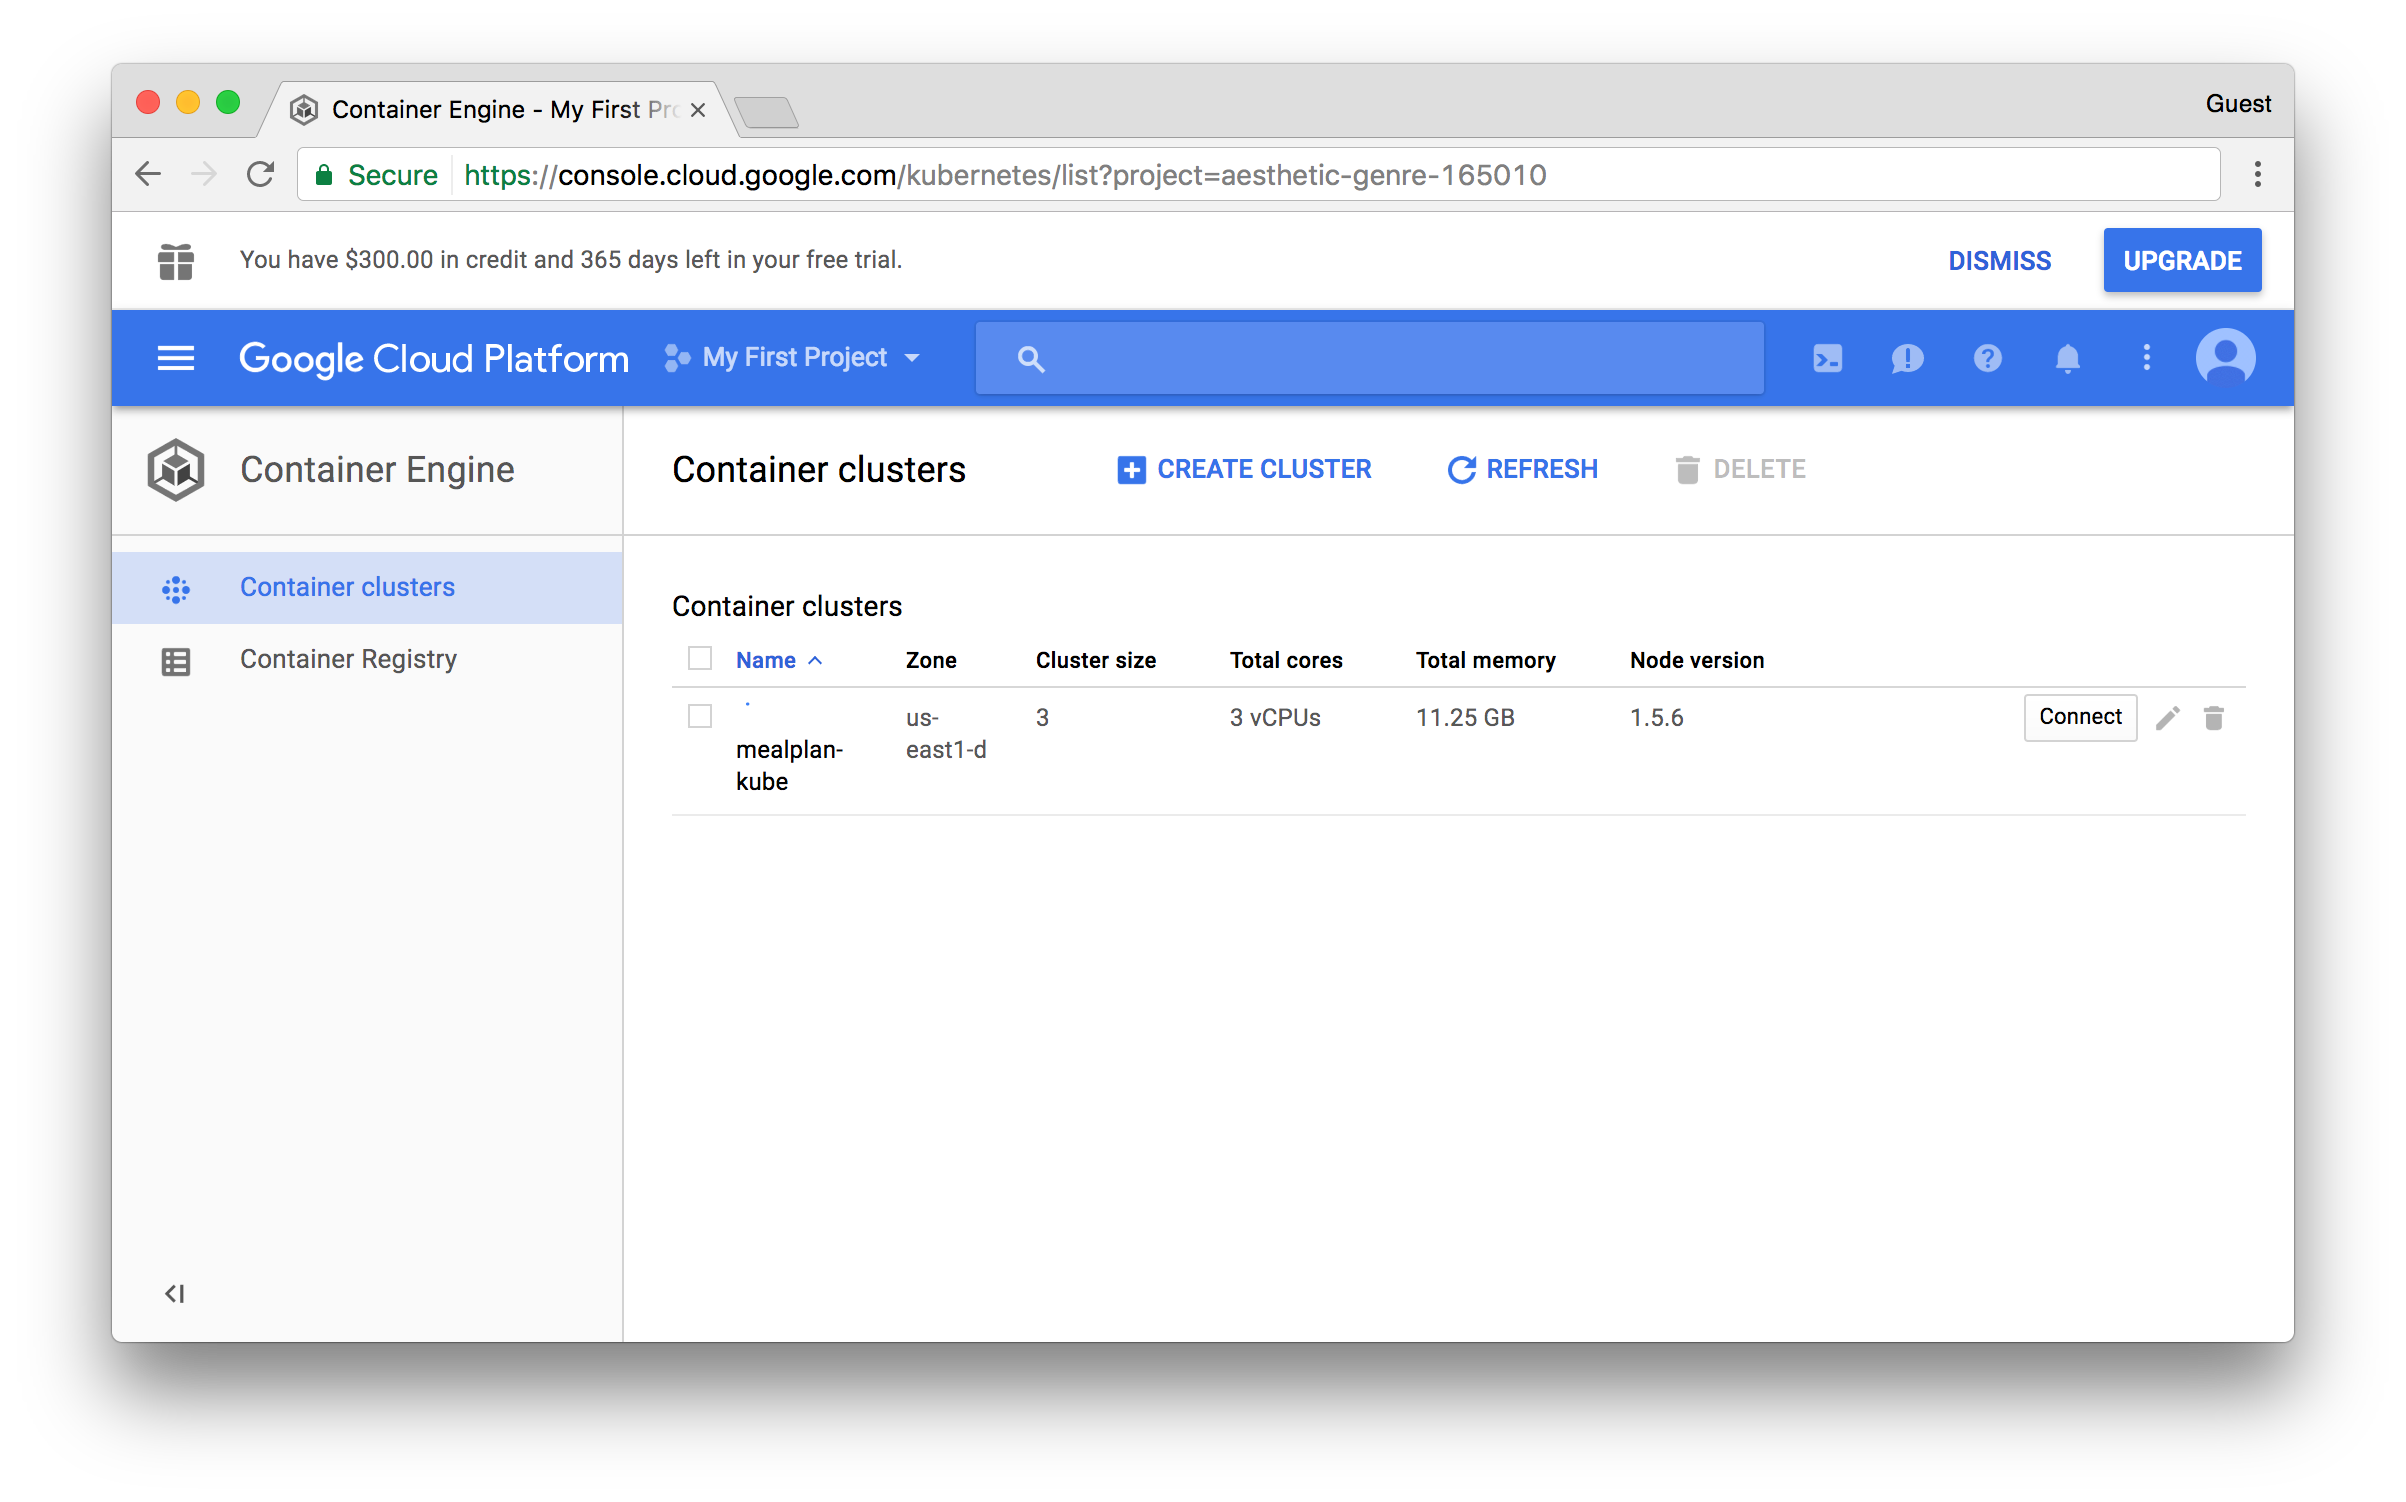
Now that you have a connection to the Google Cloud it’s time to create a cluster in the Google Container Engine. This command will create a default, three node cluster:
$ gcloud container clusters create mealplan-kubeThis will create a cluster using the default settings (and your region setting). As of right now, the default will create 3 nodes that all have 3.75Gb of RAM and 1 CPU. You can view your existing clusters by visiting the Container Engine Dashboard
Next, ensure that your kubectl command is connected to the proper cluster by running:
$ kubectl get pods
No resources found.
If you get an error you may need to reauthenticate using gcloud auth application-default login or ensure that your kubectl command is the one in your google-cloud-sdk directory.
Creating the Database in the Google Cloud
With Kubernetes running and configured you can now start building up the infrastructure for everything except the Rails application. The first thing that we’ll need to create is our ConfigMap since that’s the only object we’ve used up to this point that didn’t have a file behind it:
$ kubectl create configmap mealplan-config \
--from-literal=postgres_user=meal_planner \
--from-literal=postgres_password=dF1nu8xT6jBz01iXAfYDCmGdQO1IOc4EOgqVB703 \
--from-literal=postgres_host=postgres \
--from-literal=pgdata=/var/lib/postgresql/data/pgdata \
--from-literal=rails_env=production \
--from-literal=rails_log_to_stdout=true \
--from-literal=secret_key_base=7a475ef05d7f1100ae91c5e7ad6ab4706ce5d303e6bbb8da153d2accb7cb53fa5faeff3161b29232b3c08d6417bd05686094d04e22950a4767bc9236991570ad
Most of these values are the same as what we used when working locally with one exception:
- We’ve added a
pgdatavalue. This will hold our customized location to store data. Because of how we’re going to mount a volume when using Google Cloud.
With the ConfigMap in place, we should be able to create quite a few of the objects without change, but our PostgreSQL storage strategy and the image we use for the Rails application will require some tweaks. For Postgres, we’re actually going to remove the PersistentVolumeClaim and PersistentVolume entirely and instead mount a disk that we’ll create outside of Kubernetes. The notable changes that we’ll need to make will be the addition of the PGDATA environment variable and the changes to our volume declaration.
deployments/postgres.yml
# the postgres Service was not modified
---
apiVersion: extensions/v1beta1
kind: Deployment
metadata:
  name: postgres
spec:
  template:
    metadata:
      labels:
        app: postgres
    spec:
      containers:
        - image: "postgres:9.6.2"
          name: postgres
          env:
            - name: POSTGRES_USER
              valueFrom:
                configMapKeyRef:
                  name: mealplan-config
                  key: postgres_user
            - name: POSTGRES_PASSWORD
              valueFrom:
                configMapKeyRef:
                  name: mealplan-config
                  key: postgres_password
            - name: PGDATA
              valueFrom:
                configMapKeyRef:
                  name: mealplan-config
                  key: pgdata
          ports:
            - containerPort: 5432
              name: postgres
          volumeMounts:
            - name: postgres-storage
              mountPath: /var/lib/postgresql/data
      volumes:
        - name: postgres-storage
          gcePersistentDisk:
            fsType: ext4
            pdName: postgres-disk
Before we actually create these objects we’ll need to create the disk that we’re connecting to:
$ gcloud compute disks create --size 200GB postgres-diskIf you set the size to less than 200GB it will give you output mentioning degraded performance, but the size you use for this test project is really up to you.
$ kubectl create -f deployment/postgres.ymlBuilding Our Custom Images
Now we need to create our Nginx and Ruby on Rails objects, but we’re in a weird spot because the images that we used locally were built directly on the minikube host. We can’t do this now, so we need to publish our custom Nginx image and application image. In a production setting these images would likely be private so we’ll make them private now using the Google Container Registry as our own private Docker registry.
Let’s first build our Nginx image:
$ docker build -t coderjourney/mealplan-frontend:1.0.0 nginx/With the image built we now need to create a separate tag that will represent where this will go in the Google Container Registry. You’ll need a few things for this:
- Your project ID from the Google Console. You can attain this by running:
$ gcloud projects list
PROJECT_ID              NAME              PROJECT_NUMBER
aesthetic-genre-165010  My First Project  667269030415
In this case, mine is aestetic-genre-165010.
- You’ll need to determine which prefix to use based on your location. The root URL can be either
us.gcr.io,eu.gcr.io, orasia.gcr.ioso pick the one that best fits your situation.
With those two pieces of information, we’re now ready to tag our image.
$ docker tag coderjourney/mealplan-frontend:1.0.0 us.gcr.io/aesthetic-genre-165010/mealplan-frontend:1.0.0With the image created and named you’re now ready to publish it:
$ gcloud docker -- push us.gcr.io/aesthetic-genre-165010/mealplan-frontend:1.0.0Now we need to change our Nginx Deployment to use this image:
deployments/frontend.yml
# Remainder of deployments/frontend.yml remained unchanged
---
apiVersion: extensions/v1beta1
kind: Deployment
metadata:
  name: frontend
spec:
  template:
    metadata:
      labels:
        app: mealplan
        tier: frontend
    spec:
      containers:
        - image: us.gcr.io/aesthetic-genre-165010/mealplan-frontend:1.0.0
          name: nginx
          lifecycle:
            preStop:
              exec:
                command: ["/usr/sbin/nginx","-s","quit"]
Now we’re ready to create the service and deployment for our frontend.
$ kubectl create -f deployments/frontend.yml
service "frontend" created
deployment "frontend" created
Since our frontend service used the type of LoadBalancer we can actually see something different when we view the services:
$ kubectl get services
NAME         CLUSTER-IP      EXTERNAL-IP       PORT(S)        AGE
frontend     10.83.253.179   35.185.18.142     80:30222/TCP   1m
kubernetes   10.83.240.1     <none>            443/TCP        1h
postgres     10.83.240.176   <none>            5432/TCP       20m
The frontend service now has an external IP. This is done by using the load balancers provided via Google Cloud (it would use ELBs if you were working in AWS instead).
Now we’ll repeat the steps that we took with the frontend service with the Rails app image.
Create, Tag, and Publish MealPlan Image
$ docker build -t coderjourney/mealplan:1.0.0 .
$ docker tag coderjourney/mealplan:1.0.0 us.gcr.io/aesthetic-genre-165010/mealplan:1.0.0
$ gcloud docker -- push us.gcr.io/aesthetic-genre-165010/mealplan:1.0.0
Change image in MealPlan Deployment
deployments/mealplan.yml
# Only showing the line that needs to change.
image: us.gcr.io/aesthetic-genre-165010/mealplan:1.0.0
Creating Deployment and Service for MealPlan
$ kubectl create -f deployments/mealplan.yml
$ kubectl create -f services/mealplan.yml
Creating the Database
Now that all of our services are running the last thing that we need to do is create the database. We’ll do that the same way did previously by using the kubectl exec command, but first, we need the pod name for our mealplan app:
$ kubectl get pods
NAME                        READY     STATUS    RESTARTS   AGE
frontend-4042454129-cgj47   1/1       Running   0          7m
mealplan-1372581369-btcq3   1/1       Running   0          2m
postgres-1223040448-qhm13   1/1       Running   0          10m
Now we can setup our database:
$ kubectl exec mealplan-1372581369-btcq3 --stdin --tty -- bundle exec rake db:setup db:migrateNow that the database exists you can connect to your frontend using the root IP address of the service. My IP is 35.185.18.142, but you can get yours by running kubectl get services and grabbing the public IP for the frontend service.
Cutting Costs
Don’t forget to delete the Google Cloud objects that we created if you don’t plan on paying for them. You can delete them with these commands:
$ gcloud container clusters delete mealplan-kube
$ gcloud gcloud compute disks delete postgres-disk
You’ll also want to delete the load balancers and images, and the easiest way to do that is through the web UI, head here to delete the load balancers. Go here (and click “Container Registry”) to delete the images.
Recap
Going from minikube to a production environment didn’t take a ton of changes on our part, but it did take enough to make for an interesting exercise. You now have some experience using the gcloud utility for interacting with the Google Cloud and have an actual Kubernetes cluster running in the wild.