Today we’re going to use the Recipe that we created in the previous controller, setting up controller actions and views so that a user can create and manage his or her recipes.
Goal for this Tutorial:
- Create CRUD actions for the Recipe model.
- Restrict Routes to only logged in Users.
In the previous tutorial we did most of the heavy lifting around Recipes. Knowing that our data makes sense, and preventing obvious data corruption problems was a good start. Today we’re going to create the common workflow views that a User will take to manipulate recipes.
For this to work we’re going to need to set up the following routes:
/recipes- Listing out all of the recipes that a User has. Will also show a link to create a new recipe./recipes/new- Shows a form for creating a new Recipe. Should be able to cancel and return to the listing./recipes/:id- Shows the details for an individual recipe. Should also show buttons to edit and delete the recipe.
All of the interactions we’ve just described are often referred to as “CRUD” which stands for Create Read Update Delete.
Recipes Controller, Views, and Routes
Before we get too far into the code that will actually perform the CRUD we’ll set up the portions that view content to the user. We’re not going to spend any time making this look pretty, but we will make sure that the html structure is semantic so that when we come back later to style this we don’t have a bad time.
To start we know we’re going to need a new view directory for recipes so we’ll create that now:
$ mkdir -p app/views/recipesWe’re also going to need the controller so we’ll add an empty on at app/controllers/recipes_controller.rb
app/controllers/recipes_controller.rb
class RecipesController < ApplicationController
end
Lastly, we’re going to need to set up our routes.
config/routes.rb
Rails.application.routes.draw do
  # For details on the DSL available within this file, see http://guides.rubyonrails.org/routing.html
  root to: "welcome#show"

  resources :recipes
end
Now if we check our rake routes it should now include the following:
           recipes GET    /recipes(.:format)                      recipes#index
                   POST   /recipes(.:format)                      recipes#create
        new_recipe GET    /recipes/new(.:format)                  recipes#new
       edit_recipe GET    /recipes/:id/edit(.:format)             recipes#edit
            recipe GET    /recipes/:id(.:format)                  recipes#show
                   PATCH  /recipes/:id(.:format)                  recipes#update
                   PUT    /recipes/:id(.:format)                  recipes#update
                   DELETE /recipes/:id(.:format)                  recipes#destroy
Rendering Recipes
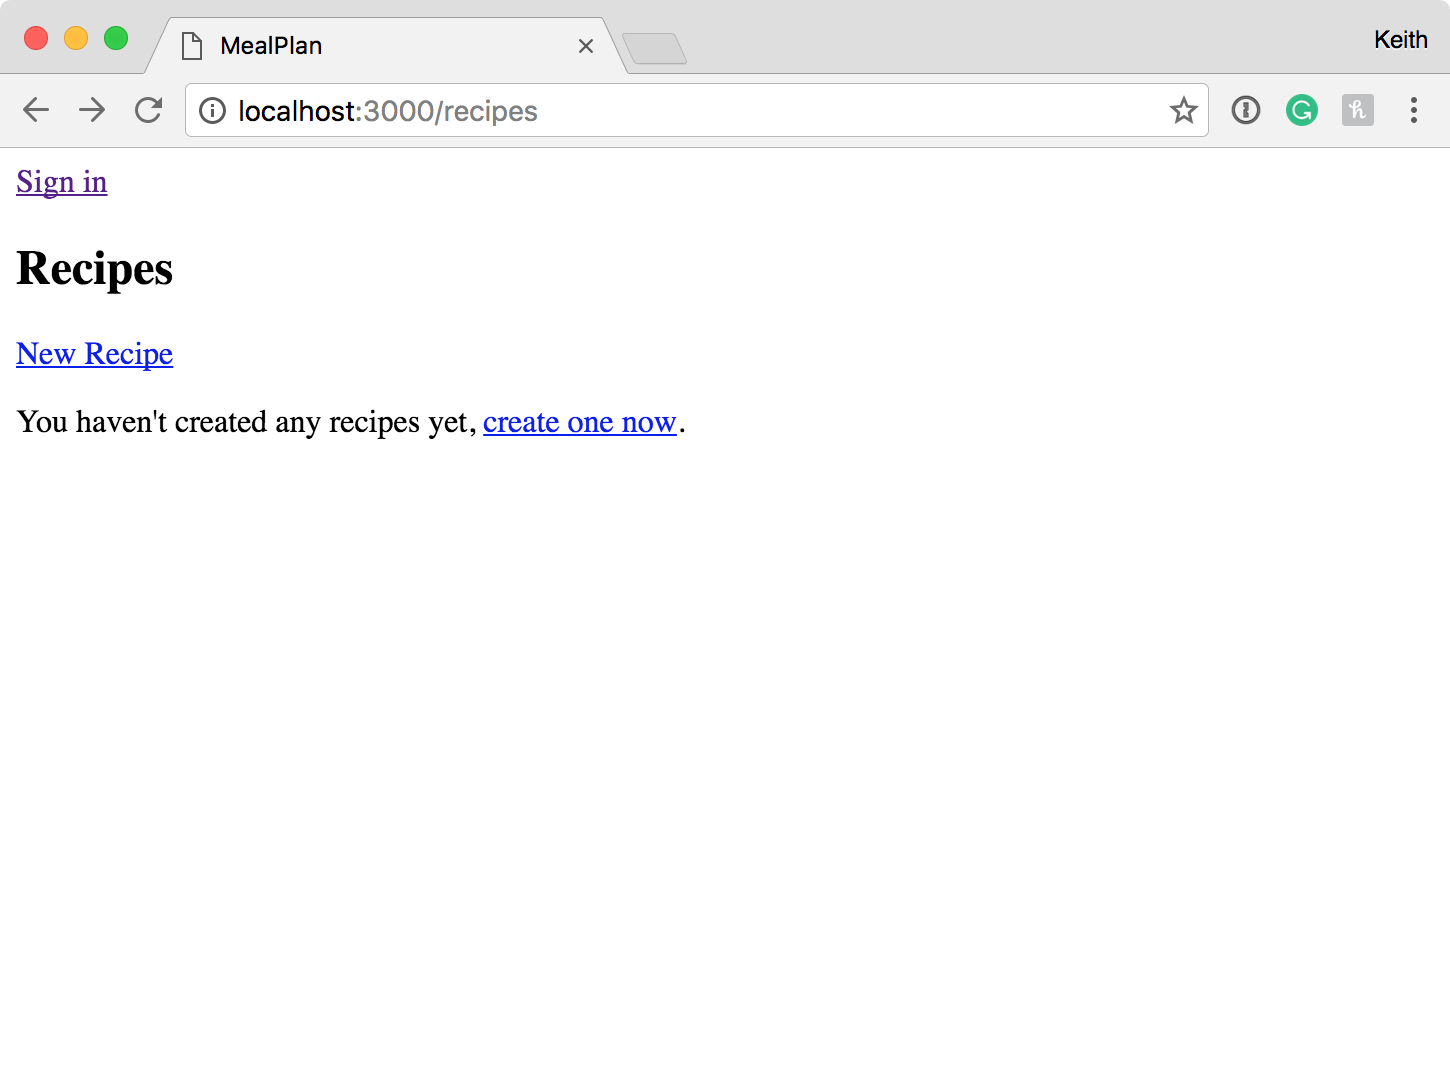
Now that we have the backbone of this portion of the app there we can start building on it. The first thing we’re going to do is display the existing recipes. We’ll do this in the index.html.erb view.
app/views/recipes/index.html.erb
<h1>Recipes</h1>

<div class="recipes">
  <% @recipes.each do |recipe| %>
    <div class="recipe">
      <h3><%= link_to recipe.name, recipe_path(recipe) %></h3>
      <p><%= recipe.description %></p>
      <ul class="recipe-actions">
        <li><%= link_to "Edit", edit_recipe_path(recipe) %></li>
        <li><%= link_to "Delete", recipe_path(recipe), data: {
          confirm: "Are you sure you want to delete: #{recipe.name}?"
        }, method: :delete %></li>
      </ul>
    </div>
  <% end %>
</div>
We need to create the @recipes instance variable in the index action of the RecipesController.
app/controllers/recipes_controller.rb
class RecipesController < ApplicationController
  def index
    @recipes = Recipe.all
  end
end
Now if you go to localhost:3000/recipes you should see the following:
Creating Fake Recipes
When you bring a new person onto an application it’s usually good to set them up with some example data. Thankfully, Rails provides us with a means to do this easily through the db/seeds.rb file and the rake db:seed rake task. If you run rake db:seeds in a development environment we’ll delete the data that’s currently in the system and set up a new User who has 20 Recipes. To make the data slightly more useful we’re going to pull in the “faker” gem to make our recipes more unique. Let’s first grab the gem:
Gemfile
# other gems
group :development, :test do
  gem 'byebug', platform: :mri
  gem 'minitest-rails'
  gem 'factory_girl_rails'
  gem 'faker'
end
# other gems
We put it into the development and test groups so that we can use Faker in our recipe factory. Let’s change the factory to use that now:
test/factories/recipes.rb
FactoryGirl.define do
  factory :recipe do
    name { Faker::Hipster.sentence }
    description  { Faker::Hipster.paragraph }
    association(:user)
  end
end
Putting the Faker portions in a block (the { ... }) it means that every time FactoryGirl generates a recipe it will call those methods again. If we didn’t do that then every factory would come out have the same name and description. Now we can set up our seeds file
db/seeds.rb
exit if !Rails.env.development?

puts "Deleting Records"
Recipe.delete_all
User.delete_all

puts "Creating User"
user = FactoryGirl.create(:user, email: "test@example.com")

puts "Creating Recipes"
20.times do
  FactoryGirl.create(:recipe, user: user)
end
Since we’re taking the very destructive action of deleting all Recipes and Users we want to make sure that this file will never accidentally be run in an environment that isn’t used for development purposes. It would currently fail to finish in say production because the “faker” gem would be missing, but it wouldn’t hit that failure until after the damage was already done.
Run rake db:seed now and you’ll populate your database with some recipes. If you then refresh localhost:3000/recipes you should see something like this:
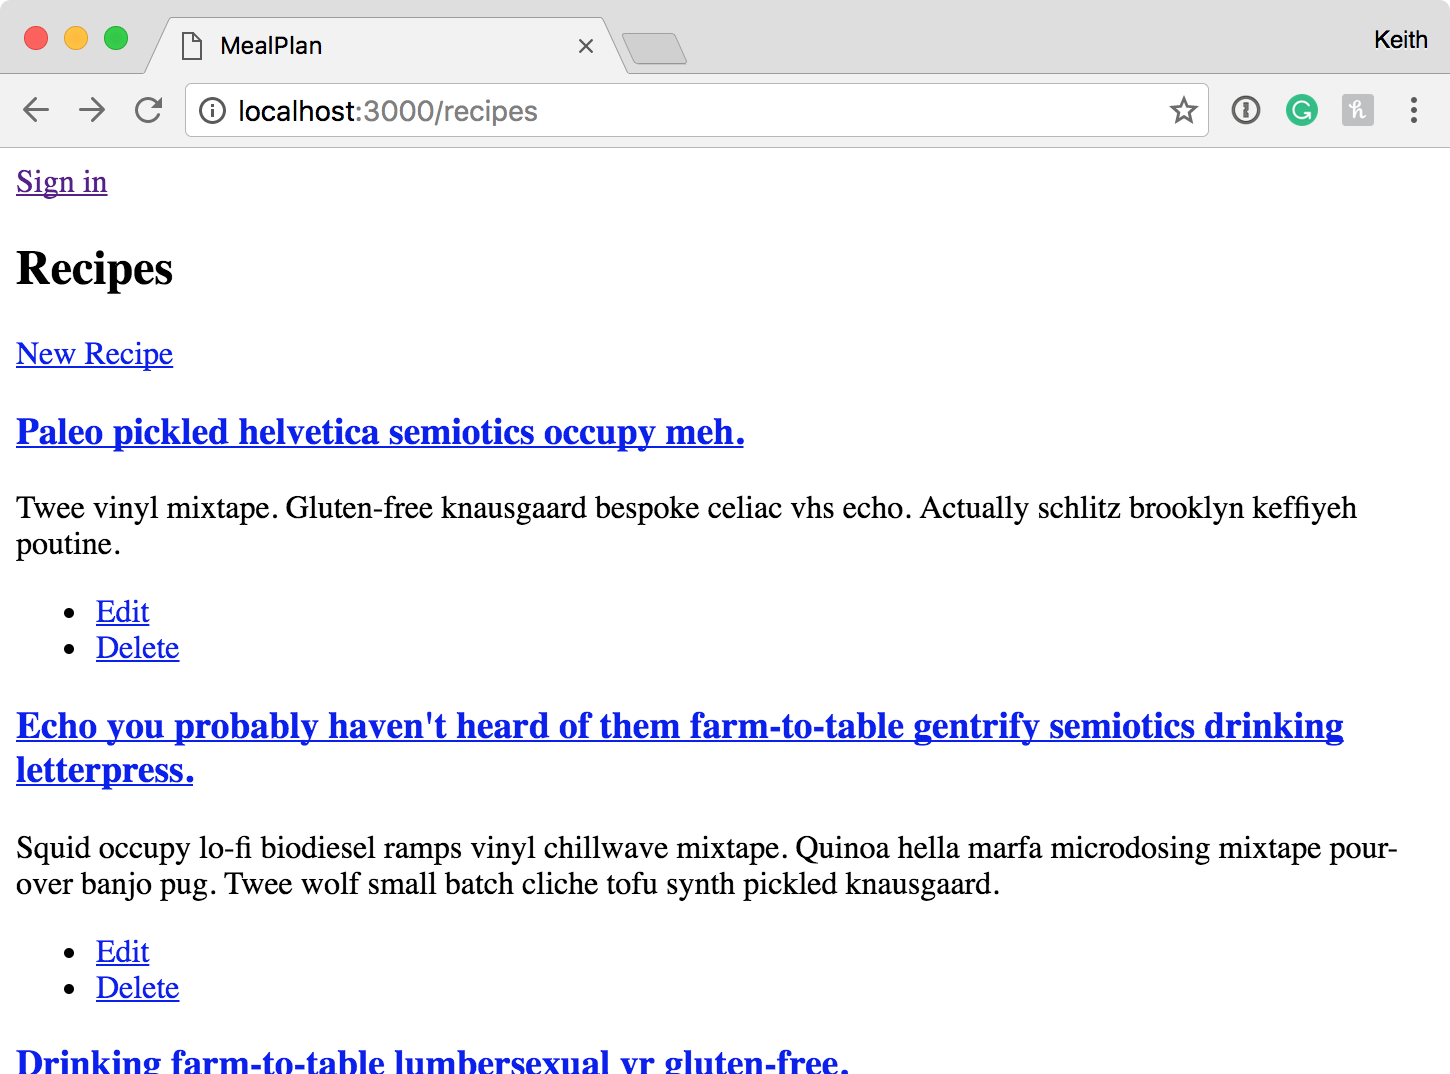
While it’s not pretty, the data is structured in the way that we expect.
Viewing an Individual Recipe
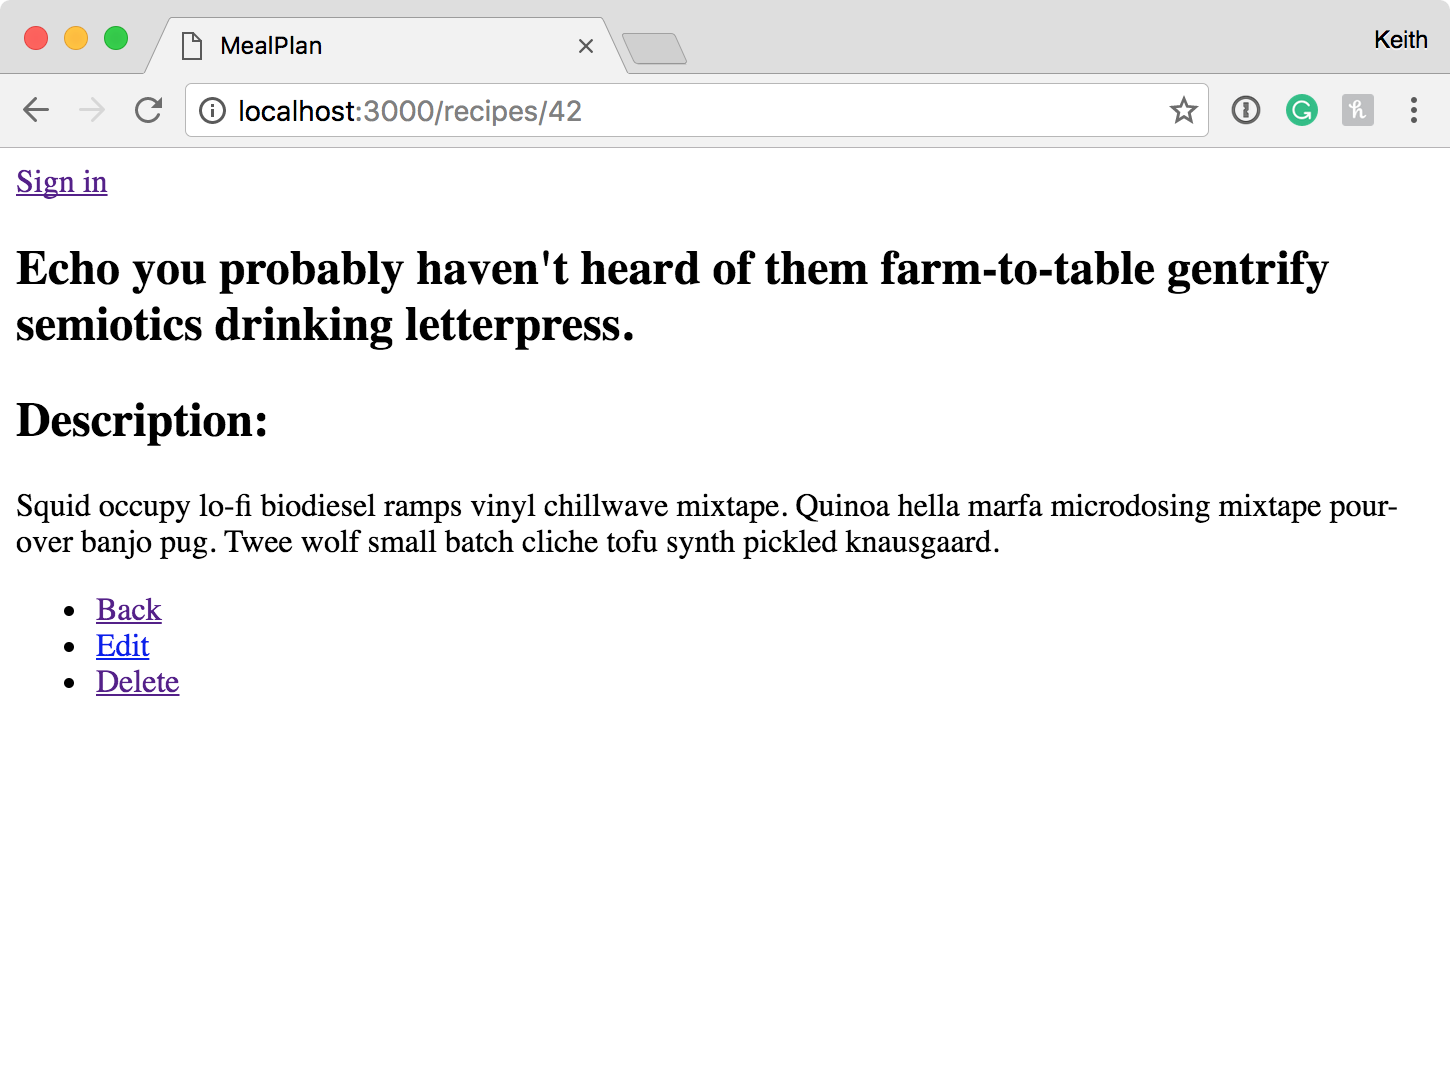
While it’s great to see the entire list of recipes we also need to be able to see and link to a single recipe (by clicking on its name). For this to work we need to build the “show” action and view. Let’s build the action first.
app/controllers/recipes_controller.rb
def show
  @recipe = Recipe.find(params[:id])
end
Pretty simple, we just need to grab the recipe from the database. Onto the view:
app/views/recipes/show.html.erb
<h1><%= @recipe.name %></h1>

<h2>Description:</h2>
<p><%= @recipe.description %></p>

<div>
  <ul class="recipe-actions">
    <li><%= link_to "Back", recipes_path %></li>
    <li><%= link_to "Edit", edit_recipe_path(@recipe) %></li>
    <li><%= link_to "Delete", recipe_path(@recipe), data: {
      confirm: "Are you sure you want to delete: #{@recipe.name}?"
    }, method: :delete %></li>
  </ul>
</div>
We duplicated the recipe actions from our index page, but we added an additional item for “Back” which will take the user back to the list of recipes. We also had to make sure that we were using @recipe in our embedded ruby instead of recipe like we did on the index page.
Now let’s wire up the “Delete” link to remove the recipe.
Deleting a Recipe
Our “Delete” link is already set up to go to the proper route, but the thing that makes it different is that it’s set up to use the method of delete. This is referring to the HTTP method, and if you look at the routes again, you’ll see that the line including the “DELETE” shows that it should go to “recipes#destroy”.
DELETE /recipes/:id(.:format) recipes#destroy
This is the action that we’ll need to set up in the controller to make this link work properly. Let’s create that now.
app/controllers/recipes_controller.rb
def destroy
  recipe = Recipe.find(params[:id])
  recipe.destroy
  redirect_to recipes_path, notice: "Deleted Recipe: #{recipe.name}"
end
First we find the recipe. We then call the destroy method which will trigger any callbacks that may exist and remove the database row. We then redirect back to the index page and include a flash message to say that the recipe was deleted. Notice that we were still able to access the name of the recipe after we “destroyed” it.
Creating a New Recipe
The create and update portions of CRUD are remarkably similar. This will allow us to build out the “New Recipe” workflow and basically get the “Edit Recipe” workflow for free.
The first thing that we need to do is set up the “new” action and view.
app/controllers/recipes_controller.rb
def new
  @recipe = Recipe.new
end
app/views/recipes/new.html.erb
<h1>New Recipe</h1>

<%= render partial: :form %>
We’re going to separate out the “form” portion of this view into a “partial” view so that we can use it in multiple views. Partial views have special names that begin with an underscore, so our “form” partial will be “_form.html.erb” Here’s what that’s going to look like:
app/views/recipes/_form.html.erb
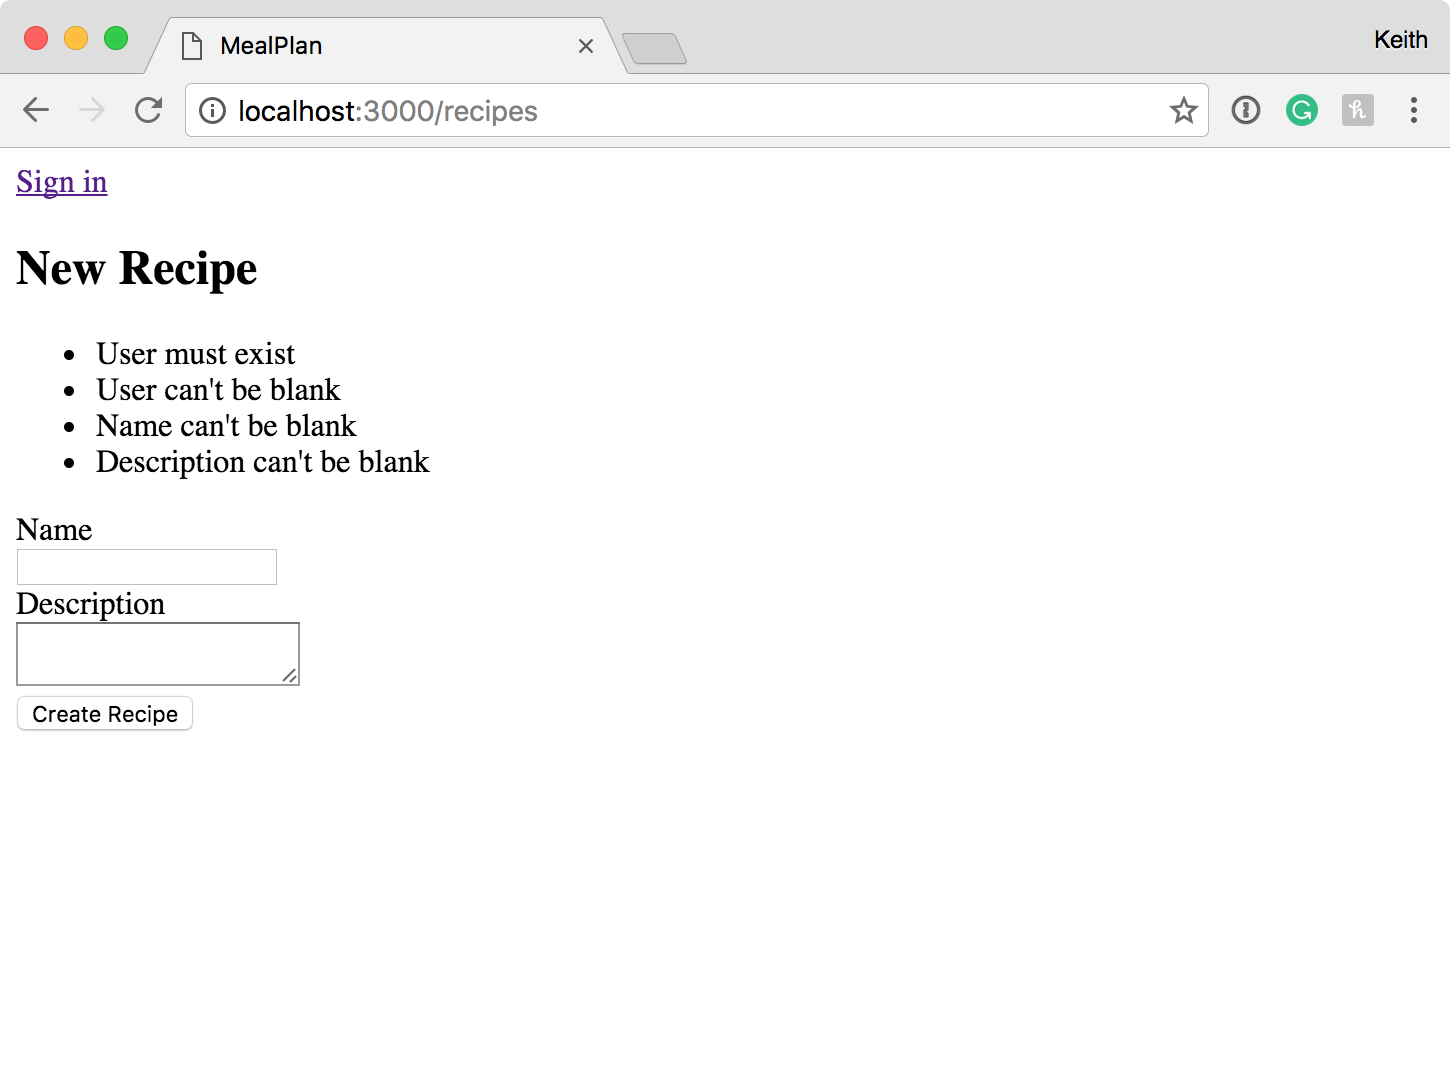
<% if @errors.present? %>
  <div class="errors">
    <ul>
      <% @errors.each do |error| %>
        <li><%= error %></li>
      <% end %>
    </ul>
  </div>
<% end %>

<%= form_for @recipe do |form| %>
  <div class="form-group">
    <%= form.label :name %>
    <%= form.text_field :name %>
  </div>

  <div class="form-group">
    <%= form.label :description %>
    <%= form.text_area :description %>
  </div>

  <div class="actions">
    <%= form.submit %>
  </div>
<% end %>
There are quite a few things going on here, but those will make more sense after we finish the “create” action. If you head to “localhost:3000/recipes/new” you should see the form now.
Before we try to use the form let’s build out the “create” action (otherwise the form will fail on submit).
app/controllers/recipes_controller.rb
def create
  @recipe = Recipe.new(recipe_params)

  if @recipe.save
    redirect_to recipe_path(@recipe), notice: "Recipe Created!"
  else
    @errors = @recipe.errors.full_messages
    render :new
  end
end

def recipe_params
  params.require(:recipe).permit(:name, :description)
end
The create method is where the magic happens, but we’re also using a feature of Rails called “strong parameters” in the recipe_params method. Strong parameters allow us to specify which parameters are allowed to be submitted and ensures that we’re not passing malicious fields from the user to our models (and thus our database connection). This is a great security feature.
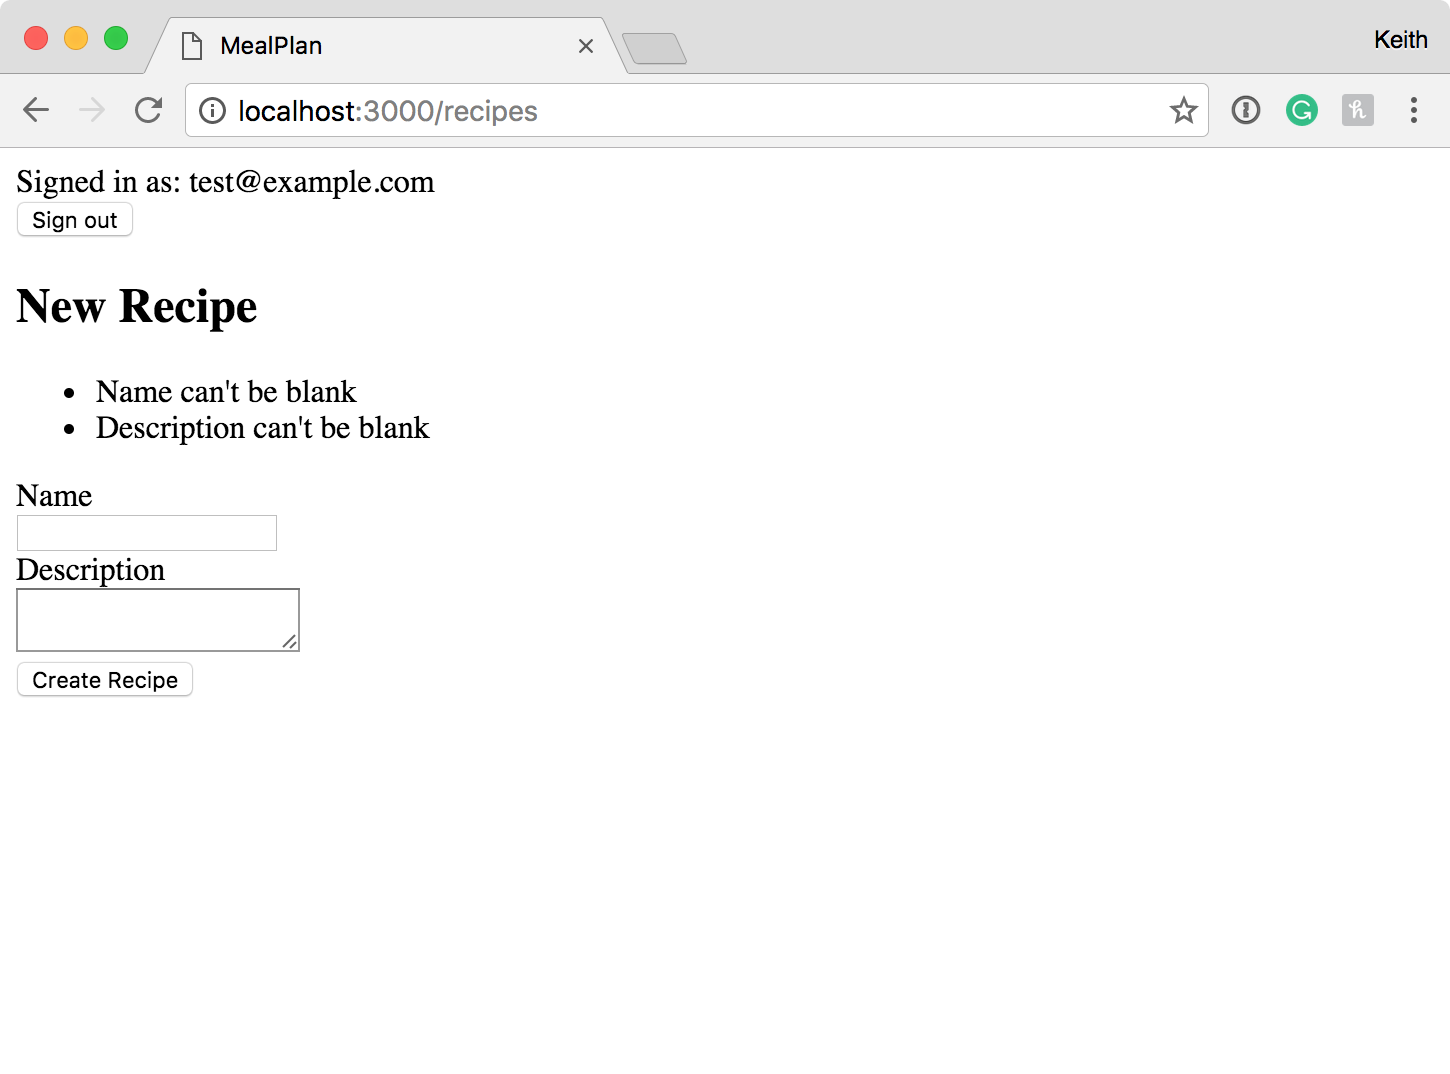
Looking at the action again, if the new recipe with the data from the form successfully saves then we will redirect to the show page for the recipe. If the call to save fails, then we’ll store the errors that occurred in a variable so that we can display these on the form that we render. To see this in action submit the form without filling in any of the values. You should see this:
This is great besides the missing user bit. Up to this point we’ve just been working with Recipes without worrying about the user, but that also meant that we were showing and allowing any visitor to edit/delete recipes. Time to add some security.
Authenticating the Recipes Controller
Thankfully, we won’t have to make a ton of changes to get the recipes controller locked down and working with the logged in user’s content. The first thing that we need to do is set up a before_action
app/controllers/recipes_controller.rb
class RecipesController < ApplicationController
  before_action :require_login

  # ...
end
With just that change, going to the recipes index page will redirect us to the sign in page. That did the entire job of restricting access to the pages, but it didn’t ensure that the user is only working with his or her recipes. To do that we’re going to remove all of the uses of Recipe in this controller, instead accessing the recipes through the current_user. Here’s our current controller, modified to work this way:
app/controllers/recipes_controller.rb
class RecipesController < ApplicationController
  before_action :require_login

  def index
    @recipes = current_user.recipes.order(:id)
  end

  def show
    @recipe = current_user.recipes.find(params[:id])
  end

  def new
    @recipe = current_user.recipes.build
  end

  def create
    @recipe = current_user.recipes.build(recipe_params)

    if @recipe.save
      redirect_to recipe_path(@recipe), notice: "Recipe Created!"
    else
      @errors = @recipe.errors.full_messages
      render :new
    end
  end

  def destroy
    recipe = current_user.recipes.find(params[:id])
    recipe.destroy
    redirect_to recipes_path, notice: "Deleted Recipe: #{recipe.name}"
  end

  private

  def recipe_params
    params.require(:recipe).permit(:name, :description)
  end
end
In a nut-shell, we’ve made the following changes:
"Recipe.all" became "current_user.recipes"
"Recipe.new" became "current_user.recipes.build"
"Recipe.find" became "current_user.recipes.find"
That won’t quite work yet though because the User class doesn’t know that it has recipes yet.
app/models/user.rb
class User < ApplicationRecord
  include Clearance::User

  has_many :recipes
end
Now if we go to “localhost:3000/recipes/new” and submit the form without any data again we should see a slightly different set of errors:
If we fill out the form properly and submit again we will have successfully created a recipe!
Editing a Recipe
I mentioned before that creating a new recipe and editing a recipe were very close to being the same thing. We’re going to reuse the “form” partial so our edit view will be the following:
app/views/recipes/edit.html.erb
<h1>Edit Recipe</h1>

<%= render partial: "form" %>
Looks pretty familiar. From here we need to set up the “edit” and “update” actions in our controller. Those will also look pretty familiar:
app/controllers/recipes_controller.rb
def edit
  @recipe = current_user.recipes.find(params[:id])
end

def update
  @recipe = current_user.recipes.find(params[:id])

  if @recipe.update_attributes(recipe_params)
    redirect_to recipe_path(@recipe), notice: "Recipe Updated!"
  else
    @errors = @recipe.errors.full_messages
    render :edit
  end
end
The differences here are that instead of using build we’re using find because the recipes already exist, and instead of save we use update_attributes. Besides those small changes these actions have the exact same shape as the “new” and “create” actions.
Recap
We covered a lot in this tutorial. Our application can actually do things! Since we have the UI and associated actions wrapped around recipes it could actually work as a functional recipe book for a User. The application is better rigged up to onboard new team members with our seed and fake data generation. You’ve now seen a lot of the features of Rails that thousands of developers use every day to be productive in their jobs.