If you’re just getting started with Kubernetes then it may be a little intimidating to start running of servers in a cloud provider like Google Cloud or AWS. Thankfully, you don’t need to use a cloud provider if you’re just dabbling with Kubernetes thanks to minikube.
Minikube will allow you to run a Kubernetes cluster on your development environment. This won’t exactly match the experience that you’ll have in a deployed environment, but it will be close enough to let you get your bearings.
Installing Kubectl
Minikube will help when learning Kubernetes, but it won’t actually be of much use unless you have the kubectl command installed.
You’ll want to follow these instructions to install kubectl for your operating system. I’m working on macOS so I’ll be using homebrew to install.
$ brew update && brew install kubectlMake sure that you’re set up properly before continuing.
$ kubectl version
Client Version: version.Info{Major:"1", Minor:"5", GitVersion:"v1.5.4", GitCommit:"7243c69eb523aa4377bce883e7c0dd76b84709a1", GitTreeState:"clean", BuildDate:"2017-03-08T02:50:34Z", GoVersion:"go1.8", Compiler:"gc", Platform:"darwin/amd64"}
Installing Minikube
Installing minikube works in a similar way to most of the installation directions for kubectl. Follow the instructions for the latest version found here. Some of the commands utilize sudo, but depending on your development environment set up you may not need them to.
Since I’m on macOS, I’ll use the corresponding instructions:
$ curl -Lo minikube https://storage.googleapis.com/minikube/releases/v0.17.1/minikube-darwin-amd64 && chmod +x minikube && mv minikube /usr/local/bin/With minikube installed you’re ready to start your first cluster (this might take a little while):
$ minikube startThe minikube start process configures your kubectl to connect to it.
Your First Deployment
The atomic unit of Kubernetes is the “pod” and a pod represents everything that is necessary for an application to run. Pods include a lot of the same information that you may have seen in a docker-compose.yml file (images, volumes, networks, etc). We won’t be creating a pod directly right now because we’re going to instead create a “deployment” that will create a pod behind the scenes. For this example, we’ll use the nginx:alpine image since it is small and exposes a port for us to view the default page.
To create a new deployment you can use the kubectl run command in this way:
$ kubectl run [name-of-deployment] --image=[image-name]In this case, we’ll call the deployment webserver and use the nginx:alpine image.
$ kubectl run webserver --image=nginx:alpineNow you can take a look at the deployment & pod using the kubectl get command:
$ kubectl get deployments
NAME        DESIRED   CURRENT   UP-TO-DATE   AVAILABLE   AGE
webserver   1         1         1            1           7s

$ kubectl get pods
NAME                         READY     STATUS    RESTARTS   AGE
webserver-2615124133-bgjjv   1/1       Running   0          11s
Notice that the pod has an extra identifier as part of the name. We don’t need to manage extra info because our deployment will do it for us.
Once of the nice features of deployments is that they can keep your pods running even when something goes wrong. Let’s delete the pod that was created with the deployment and see what happens. Whenever you delete a resource like a pod, deployment, or service you’ll use the kubectl delete command.
$ kubectl delete pod webserver-2615124133-bgjjv
pod "webserver-2615124133-bgjjv" deleted
Now if we look at the pods again we would expect to not see anything, but our deployment says otherwise.
$ kubectl get pods
NAME                         READY     STATUS    RESTARTS   AGE
webserver-2615124133-d03zm   1/1       Running   0          10s
The deployment created a replacement pod since the previous one was destroyed.
Exposing the Deployment
This webserver isn’t all that useful to us right now because it can’t be accessed, but that can be changed by creating a “service”. We’ll create a service for our “webserver” deployment by using the kubectl expose command:
$ kubectl expose deployment webserver --type=LoadBalancer --port=80We’re using the LoadBalancer type here, but you could have also used the NodePort, and we need to specify the port that will be exposed. Take a look at this service using kubectl get once again:
$ kubectl get services
NAME         CLUSTER-IP   EXTERNAL-IP   PORT(S)        AGE
kubernetes   10.0.0.1     <none>        443/TCP        3d
webserver    10.0.0.247   <pending>     80:30349/TCP   8s
Since we’re using minikube accessing this service requires another step since we can’t get an external IP. You’ll take the exposed port (in this case 30349) and access that on the minikube IP address. You can get all of this information in a single minikube command thankfully:
$ minikube service webserver --url
http://192.168.99.101:30349
Viewing the URL that the command gave you from your browser will show you the default nginx landing page.
Visualizing Kubernetes
Working with a cluster of nodes, numerous pods, and services can get a little confusing, but kubernetes can be visualized through dashboards and minikube comes with one baked right in. You can launch the dashboard using this command:
$ minikube dashboard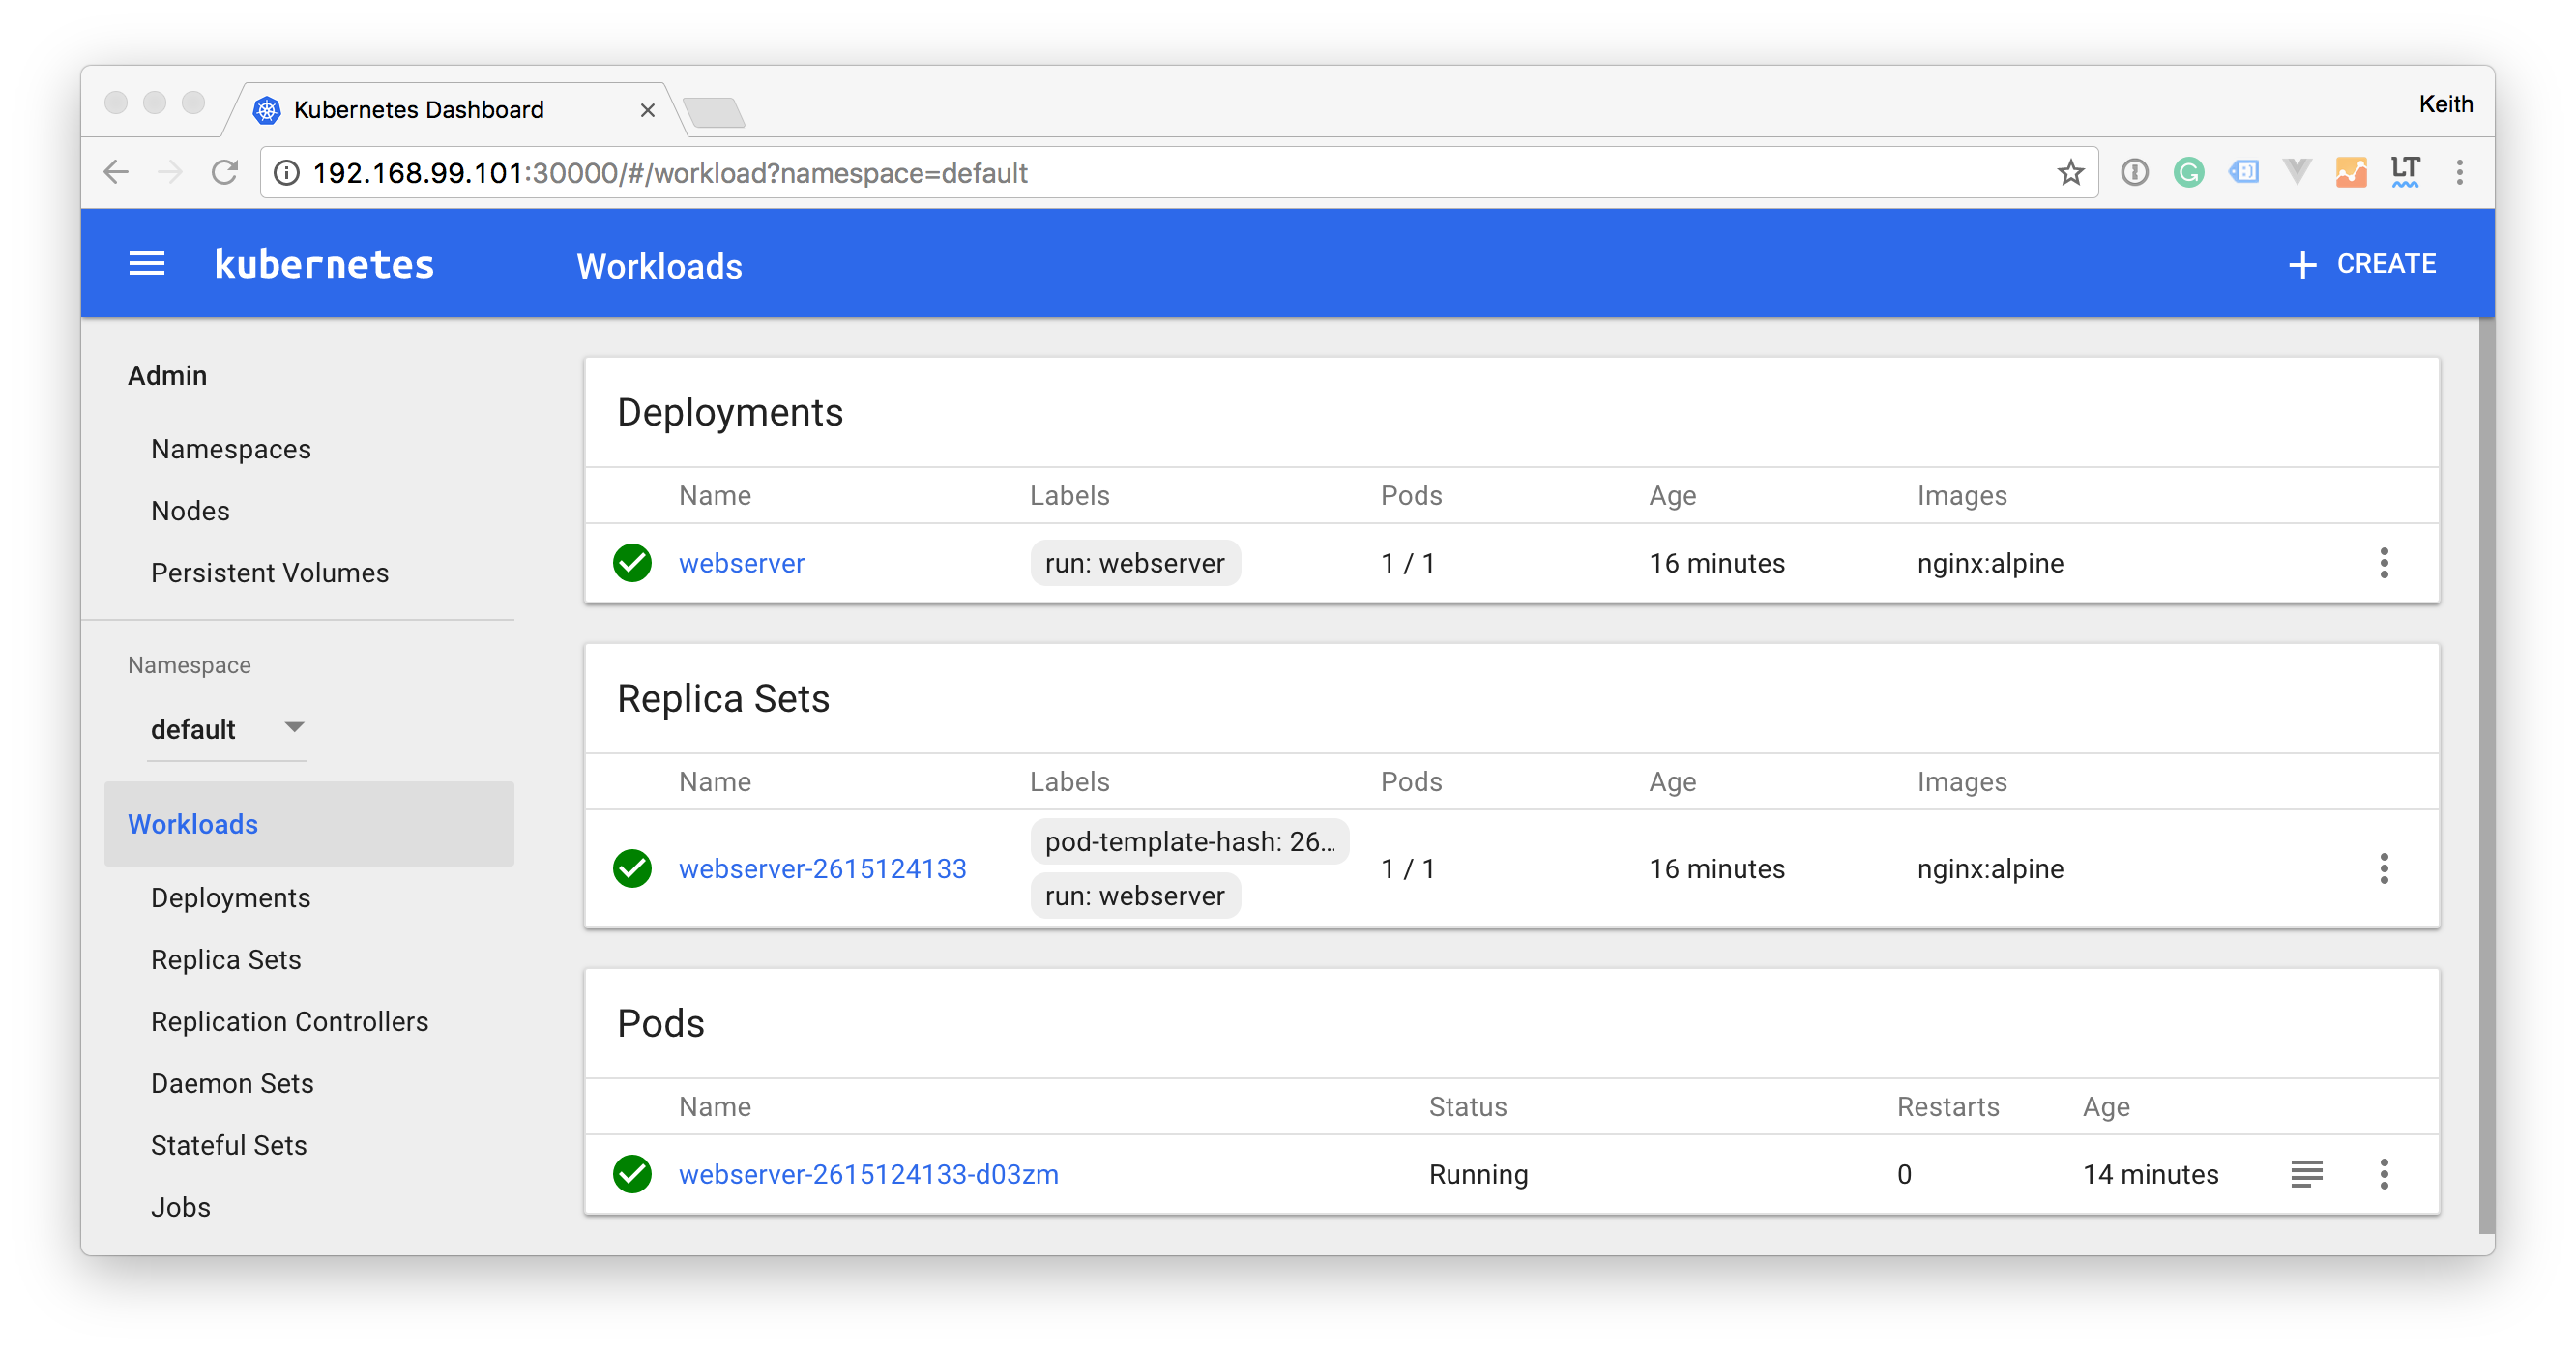
Recap
You went through quite a bit in this tutorial. You created your first Kubernetes cluster using minikube & you made a deployment that you exposed using a service. As this series continues you’ll deploy increasingly more advance setups, but this is a really good start.