React applications allow us to easily create rich user experiences, but without storing data, the experience will be limited. In this tutorial, we will add real-time persistence to our application by integrating with Firebase.
Goals
Firebase will allow us to store data in an incredibly simple way without us needing to create a server on our own. The data won’t be as searchable as it would be if we used something SQL based, but the ease of use is something to consider.
Creating a Firebase Account & Project
Before we can integrate with Firebase, we need to have a project to use. If you have a Google account, you will be able to create a project in Firebase by going to the console.
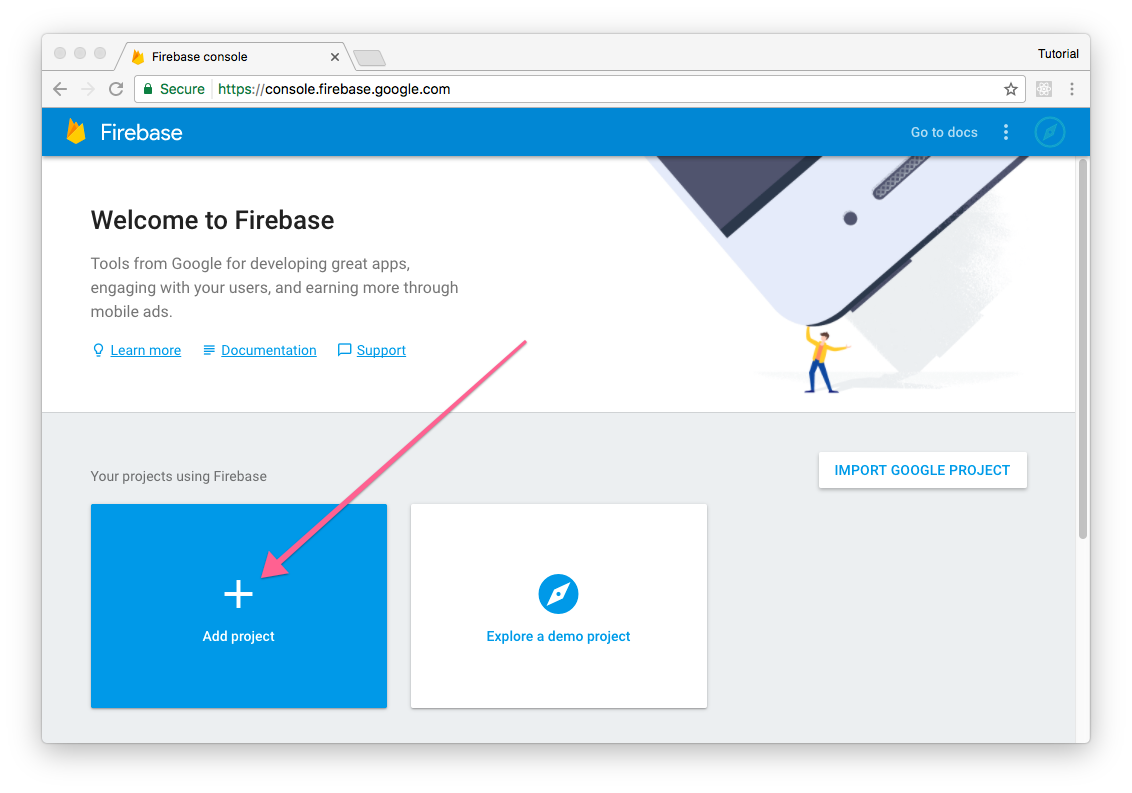
Create a project to use while following along, the Firebase free tier is generous and more than enough for us right now.
Installing Re-base and Getting Credentials
React has a unique way of thinking about state since it is mainly concerned with presentation. Because of this concern, people have written libraries around external dependencies to make them work nicely with React. Re-base is one of those libraries and the one that we’ll be using to talk to Firebase. Let’s install re-base now:
$ yarn add re-baseWith re-base installed we can now configure it using the API credentials that Firebase provides. You can find these credentials by clicking on “Add Firebase to your web app” in your Firebase console “Overview” page.
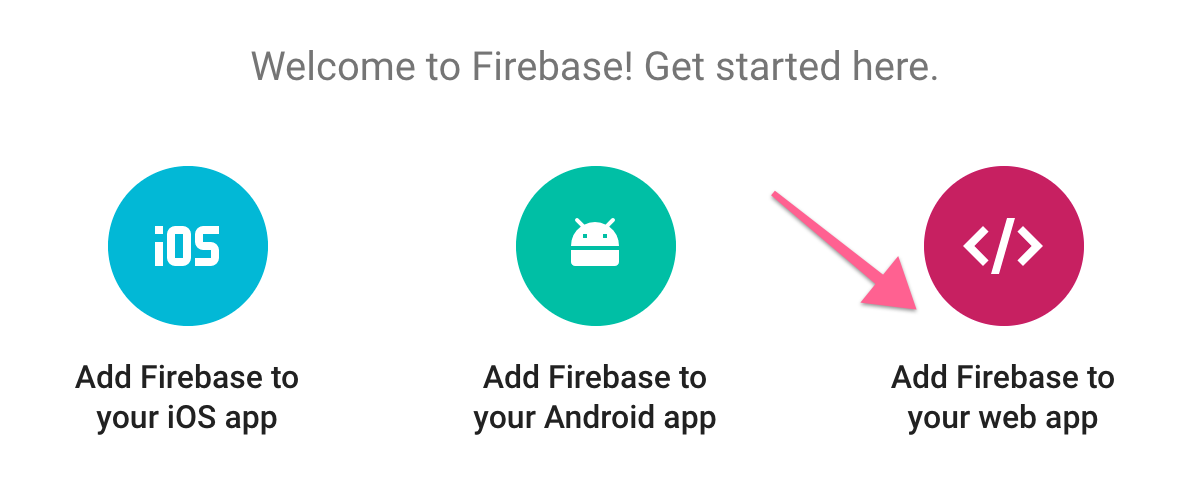
That will open a popup containing some javascript, and you’ll want to take the config object from that for us to use.
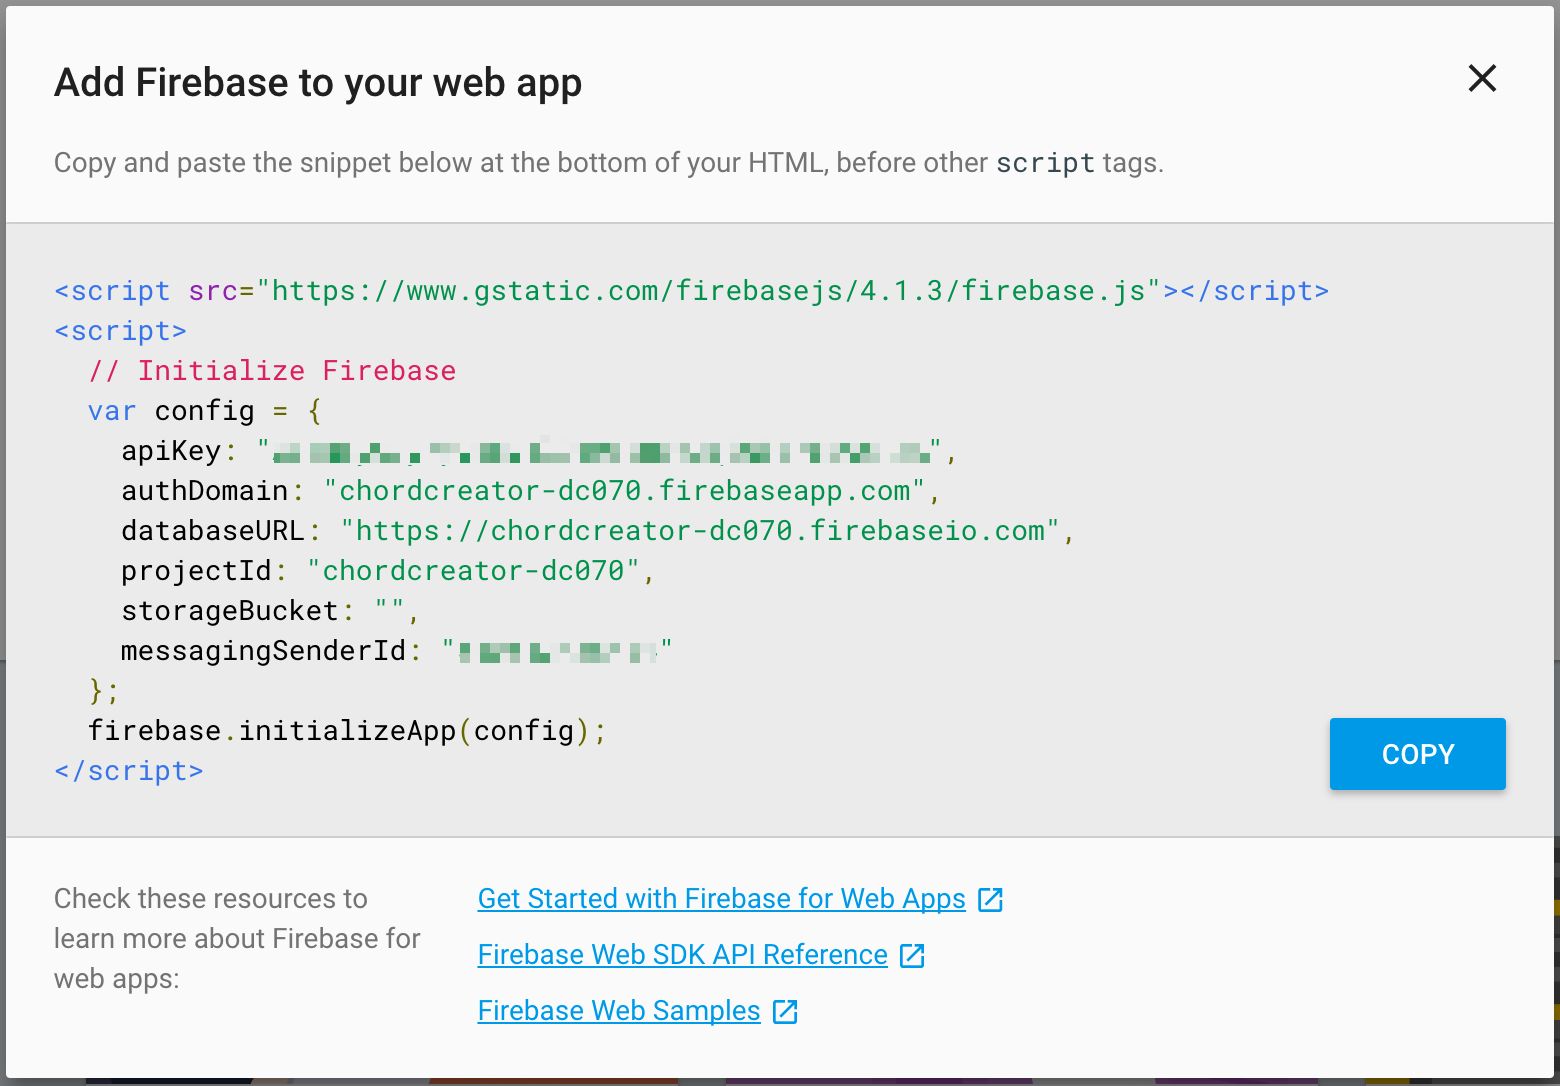
With these config values in hand, you’ll be able to put these in a .env file so that we can utilize them in the same way that we would likely use configuration values in a server rendered application.
.env
REACT_APP_FIREBASE_KEY=sample_key
REACT_APP_FIREBASE_DOMAIN=chordcreator-dc070.firebaseapp.com
REACT_APP_FIREBASE_DATABASE=https://chordcreator-dc070.firebaseio.com
REACT_APP_FIREBASE_PROJECT_ID=chordcreator-dc070
REACT_APP_FIREBASE_STORAGE_BUCKET=chordcreator-dc070.appspot.com
REACT_APP_FIREBASE_SENDER_ID=sample_sender_id
Notice that all of these variables start with REACT_APP_. Environment variables with this shape will automatically be loaded in by create-react-app’s webpack setup so that we can reference them in our code, but they’ll be substituted out when bundled.
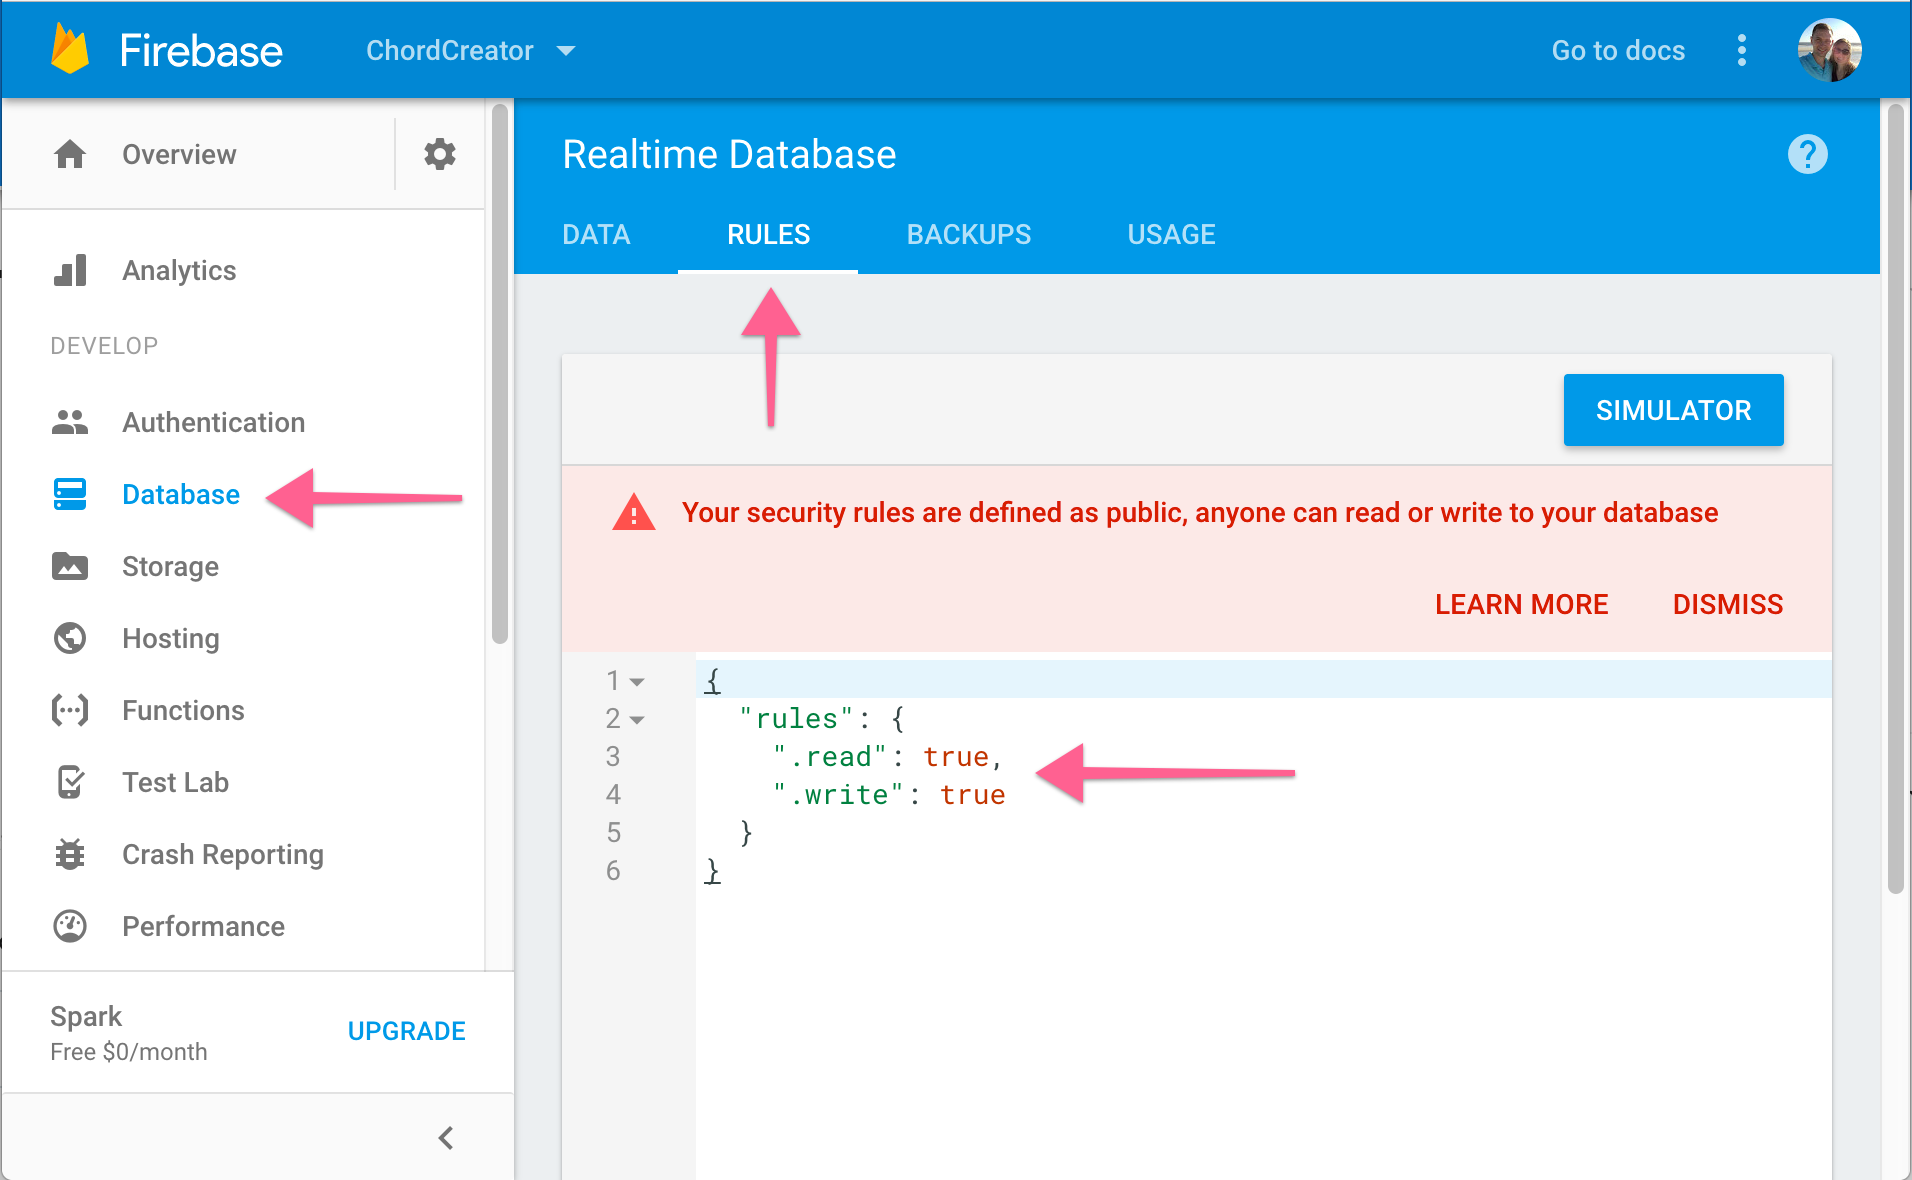
While we’re in the Firebase console, there is one more change that we need to make temporarily. We’re going to disable the authentication rules on our database so that we can interact with it before we add “users” to our app. You get to these rules by clicking “Database” in the sidebar, then “Rules” in the navigation above the main content of the page, and you’ll set both read and write to true for the time being.
The last step in our configuration is to create a “database” object to utilize in our application. Since this isn’t a component we won’t put it in the src/components directory, we’ll instead call this src/base.js.
src/base.js
import Rebase from 're-base'
import firebase from 'firebase'

const config = {
  apiKey: process.env.REACT_APP_FIREBASE_KEY,
  authDomain: process.env.REACT_APP_FIREBASE_DOMAIN,
  databaseURL: process.env.REACT_APP_FIREBASE_DATABASE,
  projectId: process.env.REACT_APP_FIREBASE_PROJECT_ID,
  storageBucket: process.env.REACT_APP_FIREBASE_STORAGE_BUCKET,
  messagingSenderId: process.env.REACT_APP_FIREBASE_SENDER_ID
}

const app = firebase.initializeApp(config)
const base = Rebase.createClass(app.database())

export { base }
We create the application just like the Firebase sample code did and then we utilize the database of that application to create a Rebase class.
Storing State in Firebase
Now that we have our database it’s time to use it. Firebase works off of WebSocket connections and on the free tier we have a limited number of connections, because of this, we’ll need to create a connection when someone loads our App component and then close that connection out when someone leaves our application. Thankfully, React provides all of the lifecycle hooks that we need to achieve this.
Let’s first import our base object:
src/App.js
import { base } from './base'
Next, we’re going to change the initial state to not include any songs, and we’ll also create our database bindings:
src/App.js
// imports omitted
class App extends Component {
  constructor() {
    super();
    this.updateSong = this.updateSong.bind(this);
    this.state = {
      songs: { }
    };
  }

  componentWillMount() {
    this.songsRef = base.syncState('songs', {
      context: this,
      state: 'songs'
    });
  }

  componentWillUnmount() {
    base.removeBinding(this.songsRef);
  }

  // Remainder of App omitted
}
In componentWillMount, we’re telling our base object to keep the state that we’re holding in the songs key synced up with our Firebase database. In componentWillUnmount we’re ensuring that the data binding that we created is being removed. These two methods are lifecycle methods that are already bound to our object (like the constructor), so we don’t need to do the method binding manually as we have up to this point.
If you load the application to the /songs route, you’ll no longer see anything, so we need to create a way for us to add songs. Let’s create an addSong method on App for now that we can manually use from the console.
src/App.js
class App extends Component {
  constructor() {
    super();
    this.addSong = this.addSong.bind(this);
    this.updateSong = this.updateSong.bind(this);
    this.state = {
      songs: { }
    };
  }

  addSong(title) {
    const songs = {...this.state.songs};
    const id = Date.now()
    songs[id] = {
      id: id,
      title: title,
      chordpro: ''
    };

    this.setState({songs});
  }
  // Remainder of App omitted
}
With this new method in place you can now use the React dev tools in Chrome or Firefox to create a new song by finding and clicking the App component and then running the following in the javascript console:
$r.addSong("Test Song")
You created a song in the database that you should be able to see in Firebase right away!
Recap
In this tutorial we patched up what was probably the biggest annoyance when working with our application, the data not persisting. We’re a long way from being finished with this project, but now we at least have a way to store the songs that we create.