Today we kick off our series to learn Ruby on Rails. In this tutorial, we’re going to be laying out our project structure, preview the features that we’re going to build, and do some project planning. We’re not going to write a ton of code today, but we will look into some of the very important non-coding work that goes into building a web application.
Goal for this Tutorial:
- Explore Project Goals
- Create basic Rails app
- Use Git and Github
- Plan Project features
The application that we’re going to be building over the course of this tutorial series is an application for planning meals based on recipes that a user stores. I originally built some of this application for a conference talk I gave in April 2016, but I built it using Elixir and Elm. We’ll be rebuilding this application from scratch using Ruby and Rails 5, but we can take a look at the original application for a general idea of some early features to build.
This entire tutorial series is going to be developed using Docker to run our development environment. I released a two part tutorial about using Docker while developing a Rails app, so check those out before we get started:
Exploring the Existing Project
Before we start anything related to code, let’s go over the problem that we’re trying to solve.
My wife and I use a weekly meal plan to help us determine what we should buy when we go grocery shopping, but it’s annoying to come up with the actual meal plan each week. We have a list of recipes that we rotate through, but it’s a little too big to think about each week so we often repeat the same meal multiple times before remembering one of the other ones that we like. It would be great if there was an easy way for us to generate our meal plan so that it wasn’t so taxing on us and we could more evenly rotate through our meals.
The application we’ll build to solve this problem could be incredibly complex, but we’re going to try to build this piece by piece so that it’s useful all while we’re building it. Additionally, we’re going to build this to work for more than just my wife and me, so we’ll need to have the concept of a User, authentication, and authorization.
In the Elixir version that I built for my talk, I only built the user sign up, authentication flow, and basic recipe creation, editing, and deletion.
If you use your imagination you can probably think about how we could extend this system to eventually generate a grocery list based on ingredients or balance a weekly menu based on meat selection.
Generating our App Skeleton
The first thing that we’re going to do is generate our rails application, using a container to do so like we have in the past:
$ docker run --rm -v $PWD:/usr/src -w /usr/src ruby:2.3 bashFrom inside the container, we’ll install rails and generate our application with some predefined configuration:
$ gem install rails
$ rails new meal_plan --skip-turbolinks --skip-spring -d postgresql --skip-bundle --skip-test
Now we have our rails application so we can exit the container. Before we call our application finished though we’ll create our Dockerfile, docker-compose.yml, .dockerignore and .env files:
Dockerfile:
FROM ruby:2.3.1

RUN apt-get update -yqq \
  && apt-get install -yqq --no-install-recommends \
    postgresql-client \
    nodejs \
  && apt-get -q clean \
  && rm -rf /var/lib/apt/lists

# Pre-install gems with native extensions
RUN gem install nokogiri -v "1.6.8.1"

WORKDIR /usr/src/app
COPY Gemfile* ./
RUN bundle install
COPY . .

CMD rails server -b 0.0.0.0
docker-compose.yml
version: "2"

volumes:
  db-data:
    external: false

services:
  db:
    image: postgres
    env_file: .env
    volumes:
      - db-data:/var/lib/postgresql/db-data

  app:
    build: .
    env_file: .env
    volumes:
      - .:/usr/src/app
    ports:
      - "3000:3000"
    depends_on:
      - db
.dockerignore:
.git
.gitignore
README.md

Dockerfile
docker-compose.yml
.dockerignore

log/*
tmp/*
.rake_tasks*
.env:
POSTGRES_USER=coderjourney
POSTGRES_PASSWORD=abcd1234
We’re going to strip down the Gemfile a bit and add nokogiri so we can pin it to 1.6.8.1. That will speed up our image building time any time after the initial build.
source 'https://rubygems.org'

gem 'rails', '~> 5.0.0', '>= 5.0.0.1'
gem 'pg', '~> 0.18'
gem 'puma', '~> 3.0'
gem 'sass-rails', '~> 5.0'
gem 'uglifier', '>= 1.3.0'
gem 'jquery-rails'

gem 'nokogiri', '1.6.8.1'

group :development, :test do
  gem 'byebug', platform: :mri
end

group :development do
  gem 'web-console'
  gem 'listen'
end

# Windows does not include zoneinfo files, so bundle the tzinfo-data gem
gem 'tzinfo-data', platforms: [:mingw, :mswin, :x64_mingw, :jruby]
Lastly, we need to adjust our config/database.yml file to work with containers:
database.yml:
default: &default
  adapter: postgresql
  encoding: unicode
  host: db
  username: <%= ENV["POSTGRES_USER"] %>
  password: <%= ENV["POSTGRES_PASSWORD"] %>
  pool: <%= ENV.fetch("RAILS_MAX_THREADS") { 5 } %>

development:
  <<: *default
  database: meal_plan_development

test:
  <<: *default
  database: meal_plan_test

production:
  <<: *default
  host: <%= ENV["POSTGRES_HOST"] %>
  database: meal_plan_production
Now that we have all of the pre-requisite files that we want, we can build our image and generate our database:
$ docker-compose run --rm app rake db:create db:migrateFinally, let’s make sure our rails app is running. Start the containers, daemonized, and navigate to http://localhost:3000:
$ docker-compose up -dSaving our Work
We’re going to treat this project like we would a client project. Looking at it through that lens, one of the first things I would do would be to get this into source control and set up the repository on a git server somewhere. We’ll initialize the repo and create our first commit:
$ git init
$ git add . && git commit -m 'Initial creation of dockerized rails application'
Github is going to act as our git server, so we need to create a repo there. If you’re unfamiliar with git and github then I suggest following Github’s awesome tutorials. I’m going to house my version of this application here.
Now we can push up our existing code:
$ git remote add origin git@github.com:coderjourney/meal_plan.git
$ git push -u origin master
Planning Out Features
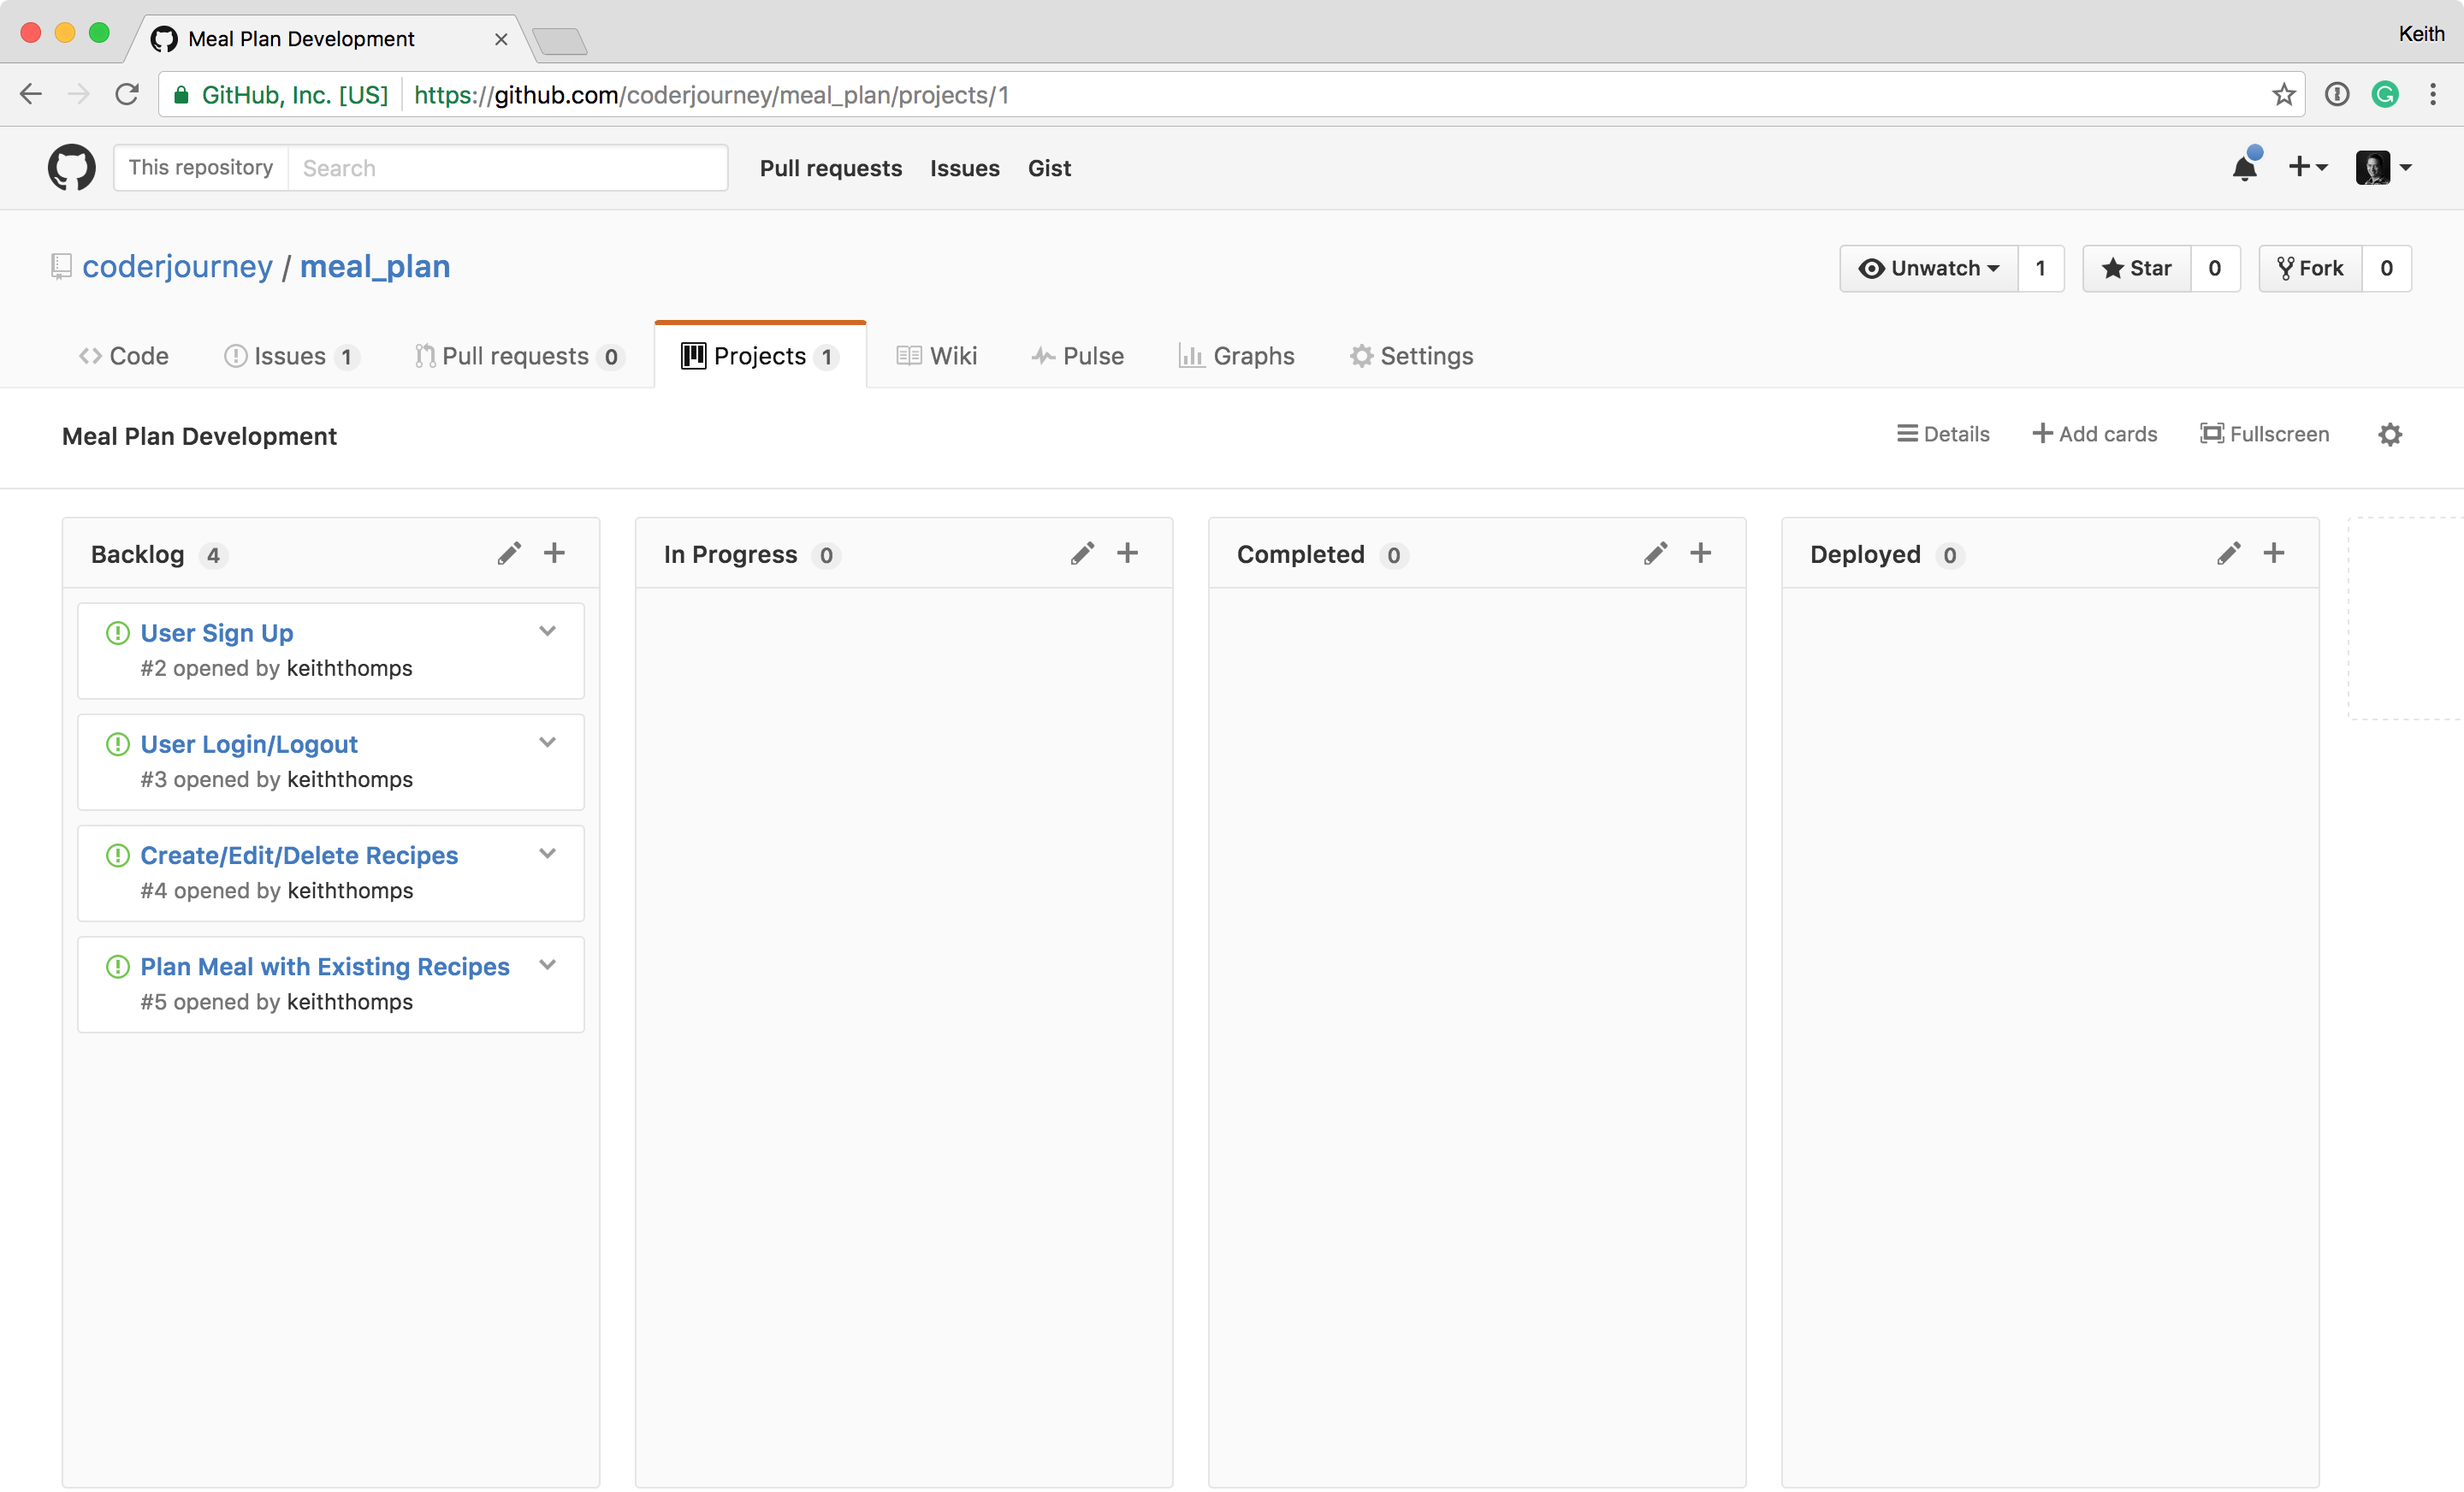
For managing our project we’re going to use the “Projects” tab in Github. Our project is going to have 4 columns to track the status of our features: “Backlog”, “In Progress”, “Completed”, “Deployed”.
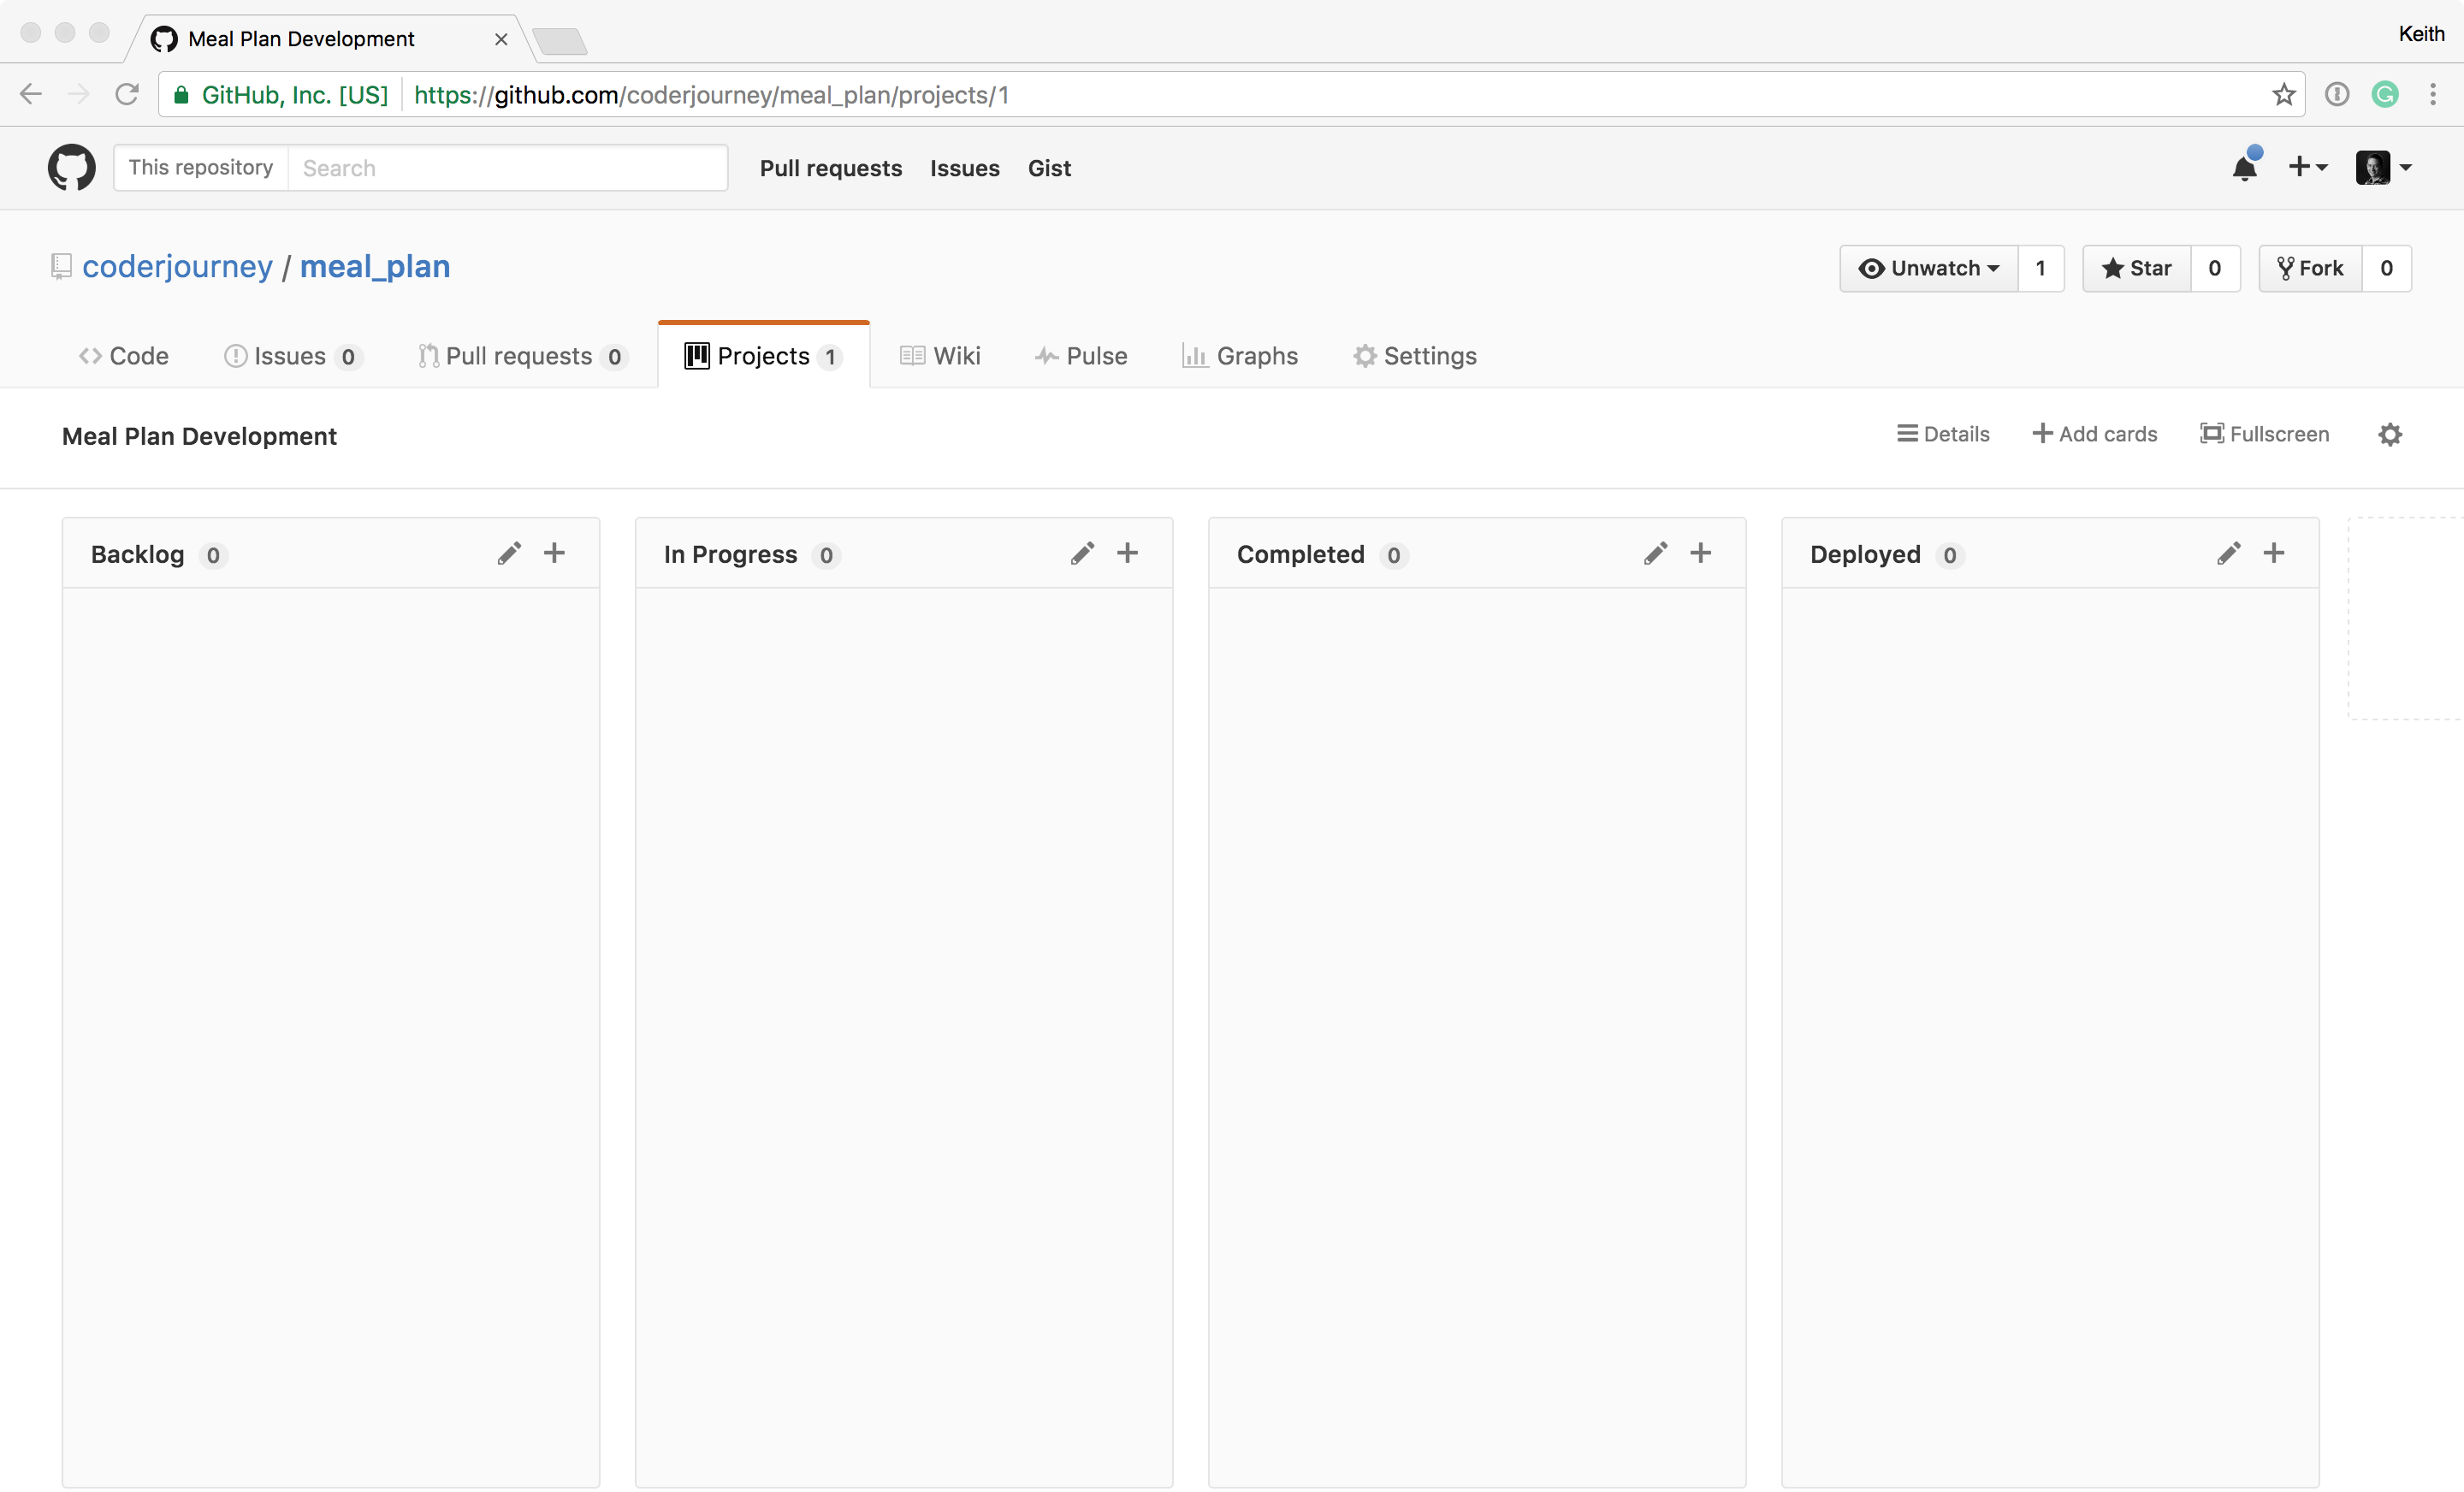
When we start implementing a feature or fixing a bug we will move a card from “Backlog” into “In Progress”. When the feature is completed we will open a pull request in Github to merge the feature brach into master. After our branch is merged we will move our card from “In Progress” to “Completed”. Each time we deploy our “master” branch to a server we will move the card collected in “Completed” into the “Deployed” column.
We’ll start off by creating cards for the features that we want to build and try to order them in a way that makes sense. Here are the features that I’m imagining we start with:
- User Sign Up
- User Login/Logout
- Allow User to View/Create/Edit/Delete Recipes
- Allow User to generate Meal Plan from Recipes
Recap
We’ve laid out the plan for building our rails application, and generated our initial project structure. In addition to the things we’ve done before, we used git for source code version control and github for project planning. In the next tutorial we will take our first card from the backlog and start building the user registration process.